Halloween Tissue Paper Pom Poms Instructions
These fun paper pom poms make awesome and inexpensive tissue paper Halloween decorations that you can make near the last minute and are very fast and easy once you know how. You can make these large or small depending on the size of the tissue paper sheets that you're using.
If you're sticking with solid colors which tend to work out a little cheaper than patterned have a go with using sheets in different colors for each finished decoration.
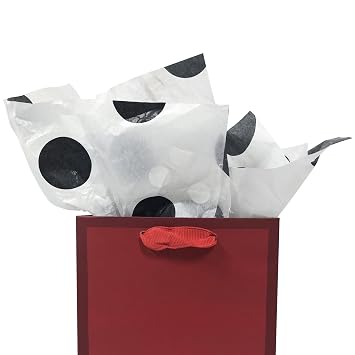
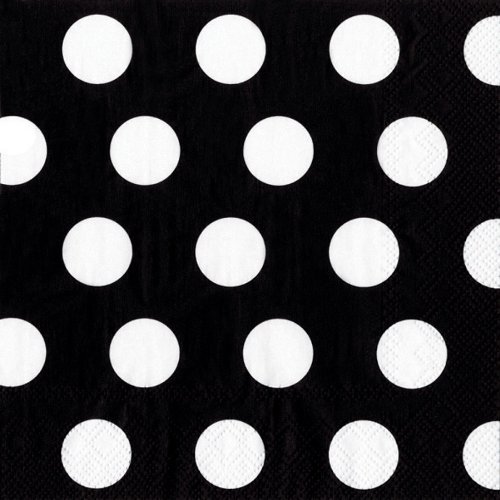
Solid colors can look great but I think it's even better to experiment with using patterned sheets. I love the black polka dot tissue paper I used last year which I teamed up with other pom poms made in hot pink.
Note: This post may contain affiliate links for which I can be compensated.

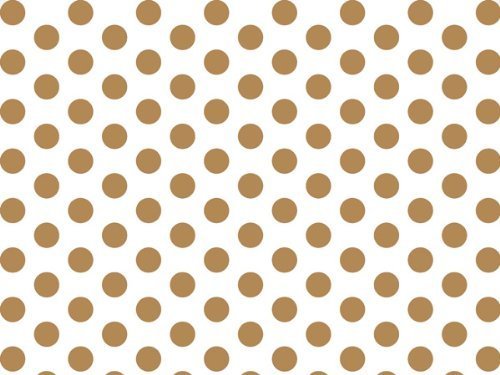
I found some really cute pink paisley rose design sheets that I plan to use for another occasion. As well as having solid colors and patterned tissue paper, you can also use a shading effect with your Halloween tissue paper pom poms.
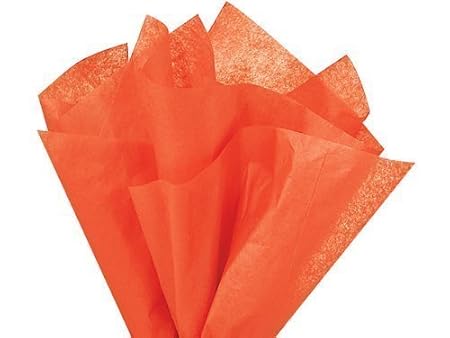
How about a cream to dark pumpkin orange color which would look good. Alternatively, a white to gray to black for a ombre effect. Work with the color scheme you're using in the room you plan to hang them in.
Materials and Tools You'll Need:

Step 1: The sheets I buy come prepacked and folded and typically measure 50x75 cm which is just over 19 x 20 inches. Other sheet sizes of tissue will work just fine and you'll get bigger or smaller results depending on what you buy but remember that they all need to be the same size for folding.
I prefer to make quite big and bold statement hanging decorations from these so I buy individual packs of tissue paper sheets which normally come in sheets of 7 for patterned and 10 or 20 for plain colors.
Although you can sort of get away with using just 7 sheets, they won't look so good so I recommend using at least 10 sheets and perhaps a bit more depending how nice, round and fluffy you want them to look.

Stack the sheets up level with at least 10 as being a recommended good amount to use as your starting point - you may choose to use a few less or a few more depending on the finished results. Place this stack onto a work surface (patterned side up if they're patterned) and have the longest side laid out horizontally before you.
You need to fold the sheets into a concertina fashion or accordion style. Most people know how to do this but if you don't, I suggest looking up how to make an accordion fold on YouTube. The folds should be roughly the same size at around 1.5-2.5 inches high.

Step 2: Once you've finished folding the whole lot, you'll have a thick strip of folded sheets which you need to roughly fold in half across the length to find the middle. Double knot a long length of twine or cord around the middle.
The reason why I say a long length of twine is because I also use this for hanging the finished piece up with. Some people wrap wire around the middle and then attach some thread, yarn or cord for hanging but just be aware that wire is more prone to rip or tear the tissue.

Step 3: To make a lovely rounded and wavy edged design around the sheets of your completed giant pom, you can round off the corners at each end just by cutting a curve with the scissors.
How you cut these ends will effect the whole look - sometimes I use soft curves and sometimes sharp points, see below.

Step 4: Cutting the ends into sharp points will give a whole different look to the decoration. Experiment with it because there are many ways of cutting.
You will find your own preference the more that you make. However, I will mention that it can be quite hard cutting through so many sheets and being neat at the same time.

Step 5: Here is the fun part. Do take your time with this. It can seem a bit disconcerting making your first one and wondering if it will actually look like anything at all. But it will do.
You need to first work on one side of the middle section you tied off, then the other. So fan out one side a little as shown in the photo above and gently pick up the top sheet and pull it up.
This may feel a little weird. There may be some resistance from the tissue from being pulled up because it's been folded but I recommend placing one hand under the top sheet and pushing it up from underneath as you gently pull from the top. Be careful not to pull too hard and rip the sheet.

Step 6: Try to pull the top sheet up into a vertical position. If you can get this top sheet properly pulled away from the rest, it will make pulling the other tissue sheets into shape much easier.
If you don't pull this top layer up far enough, the rest of your layers won't be able to come up far enough either.

Step 7: Once both sides have the layers separated, fluff up the layers even more and shape them until you get a lovely ball shape.
I ended up hanging mine up from a kitchen cupboard handle so I could easily work all around the ball shape and get those sheets where I wanted them.

Step 8: These large and giant sized tissue decorations work best hanging down from the ceiling or see the photo below where we placed them under out square archway section.
The large ones don't look good just hanging from a wall whereas small ones (think yarn pom pom size) can look OK hanging down the wall or strung together to make garlands.

We have a convenient ceiling rail where we hang hooks and drop these down into our square archway where they hang real nicely. They will also work great hung down from a ceiling and you will either need to look at screw in hooks for the ceiling or something like those adhesive Command hooks.
Tape is unlikely to work well since these can get a bit heavy, the larger they are. I hope you've enjoyed reading my justhalloweencrafts page today, thanks for your visit. Let me know what you're making below in the comments.
Related Content You Should Also Love:
Page Last Updated:
If you're sticking with solid colors which tend to work out a little cheaper than patterned have a go with using sheets in different colors for each finished decoration.
Solid colors can look great but I think it's even better to experiment with using patterned sheets. I love the black polka dot tissue paper I used last year which I teamed up with other pom poms made in hot pink.
Note: This post may contain affiliate links for which I can be compensated.
Halloween Tissue Paper Pom Poms Tutorial and Step by Step Instructions
I found some really cute pink paisley rose design sheets that I plan to use for another occasion. As well as having solid colors and patterned tissue paper, you can also use a shading effect with your Halloween tissue paper pom poms.
How about a cream to dark pumpkin orange color which would look good. Alternatively, a white to gray to black for a ombre effect. Work with the color scheme you're using in the room you plan to hang them in.
Materials and Tools You'll Need:
- Approx 10 Ssheets of Tissue per Paper Pom Pom
- Twine or thin cord for tying and hanging
- Scissors
Step 1: The sheets I buy come prepacked and folded and typically measure 50x75 cm which is just over 19 x 20 inches. Other sheet sizes of tissue will work just fine and you'll get bigger or smaller results depending on what you buy but remember that they all need to be the same size for folding.
I prefer to make quite big and bold statement hanging decorations from these so I buy individual packs of tissue paper sheets which normally come in sheets of 7 for patterned and 10 or 20 for plain colors.
Although you can sort of get away with using just 7 sheets, they won't look so good so I recommend using at least 10 sheets and perhaps a bit more depending how nice, round and fluffy you want them to look.
Stack the sheets up level with at least 10 as being a recommended good amount to use as your starting point - you may choose to use a few less or a few more depending on the finished results. Place this stack onto a work surface (patterned side up if they're patterned) and have the longest side laid out horizontally before you.
You need to fold the sheets into a concertina fashion or accordion style. Most people know how to do this but if you don't, I suggest looking up how to make an accordion fold on YouTube. The folds should be roughly the same size at around 1.5-2.5 inches high.
Step 2: Once you've finished folding the whole lot, you'll have a thick strip of folded sheets which you need to roughly fold in half across the length to find the middle. Double knot a long length of twine or cord around the middle.
The reason why I say a long length of twine is because I also use this for hanging the finished piece up with. Some people wrap wire around the middle and then attach some thread, yarn or cord for hanging but just be aware that wire is more prone to rip or tear the tissue.
Step 3: To make a lovely rounded and wavy edged design around the sheets of your completed giant pom, you can round off the corners at each end just by cutting a curve with the scissors.
How you cut these ends will effect the whole look - sometimes I use soft curves and sometimes sharp points, see below.
Step 4: Cutting the ends into sharp points will give a whole different look to the decoration. Experiment with it because there are many ways of cutting.
You will find your own preference the more that you make. However, I will mention that it can be quite hard cutting through so many sheets and being neat at the same time.
Step 5: Here is the fun part. Do take your time with this. It can seem a bit disconcerting making your first one and wondering if it will actually look like anything at all. But it will do.
You need to first work on one side of the middle section you tied off, then the other. So fan out one side a little as shown in the photo above and gently pick up the top sheet and pull it up.
This may feel a little weird. There may be some resistance from the tissue from being pulled up because it's been folded but I recommend placing one hand under the top sheet and pushing it up from underneath as you gently pull from the top. Be careful not to pull too hard and rip the sheet.
Step 6: Try to pull the top sheet up into a vertical position. If you can get this top sheet properly pulled away from the rest, it will make pulling the other tissue sheets into shape much easier.
If you don't pull this top layer up far enough, the rest of your layers won't be able to come up far enough either.
Step 7: Once both sides have the layers separated, fluff up the layers even more and shape them until you get a lovely ball shape.
I ended up hanging mine up from a kitchen cupboard handle so I could easily work all around the ball shape and get those sheets where I wanted them.
Step 8: These large and giant sized tissue decorations work best hanging down from the ceiling or see the photo below where we placed them under out square archway section.
The large ones don't look good just hanging from a wall whereas small ones (think yarn pom pom size) can look OK hanging down the wall or strung together to make garlands.
We have a convenient ceiling rail where we hang hooks and drop these down into our square archway where they hang real nicely. They will also work great hung down from a ceiling and you will either need to look at screw in hooks for the ceiling or something like those adhesive Command hooks.
Tape is unlikely to work well since these can get a bit heavy, the larger they are. I hope you've enjoyed reading my justhalloweencrafts page today, thanks for your visit. Let me know what you're making below in the comments.
Related Content You Should Also Love:
Simple and Quick Tissue Garland to Make
Make a Magical Witch Spell Book Prop
Create a Cute Little Boo Banner
More DIY Decorations for Halloween
More Halloween Papercrafts
Make a Magical Witch Spell Book Prop
Create a Cute Little Boo Banner
More DIY Decorations for Halloween
More Halloween Papercrafts
Page Last Updated:


Comments
Post a Comment
Just Halloween Crafts is a site dedicated to my favorite time of year and the whole spook time season that surrounds October 31st. I love to decorate the home with handmade, DIY and crafted items for Halloween as well as make costume accessories and do fun crafting activities. Using papercrafts, sewing with felt, no-sew techniques and more, you can create a wonderful scheme to your decor whether you are going for scary themes or more fun ones with pumpkins and more. Ghosts, witches, wizards and more make for fun crafting sessions. Thanks for leaving me a comment. Comments do not show until I approve them. Marie