Make Your Own Halloween Fairy Door Craft
Simple altered art techniques make it easy for you to make your own DIY decorative display items for Halloween. A plain wood fairy door can be transformed in lots of fun ways for this Spook-tacular occasion.
With this make your own Halloween fairy door craft, you can create a wonderfully bewitching item to keep out on display. I show you how I make my own witch themed Halloween fairy door with plenty of photos for your enjoyment.
Be inspired with this fairy door alteration to make your own witch home for Halloween. Or, alternatively, take the process and techniques that are used here to create your own creepy house decoration befitting of October 31st.
Note: This post may contain affiliate links for which I can be compensated.

Image Credit: photo belongs to the author.
Make your very own Halloween fairy door decoration that you can display on a mantel, a shelf or a table top. Transforming a plain fairy door into a witch home like the one above is an easy altered art craft that adults and older kids can enjoy.
I chose a witch theme for my design but there are plenty of other themes that you can go with for this seasonal occasion. Use this photo tutorial to gather lots of ideas on how to make your very own Halloween door.
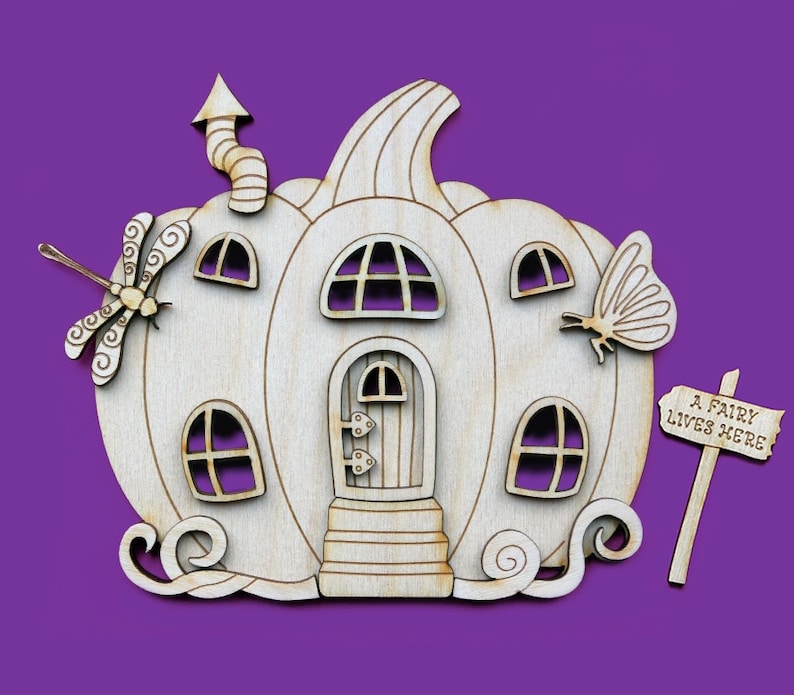
Your altered fairy door blank could be transformed into a haunted house with ghosts and ghouls, a creepy castle, a zombie hideout, a wicked wizard's keep and so much more. Enjoy this Halloween craft tutorial and get inspired.

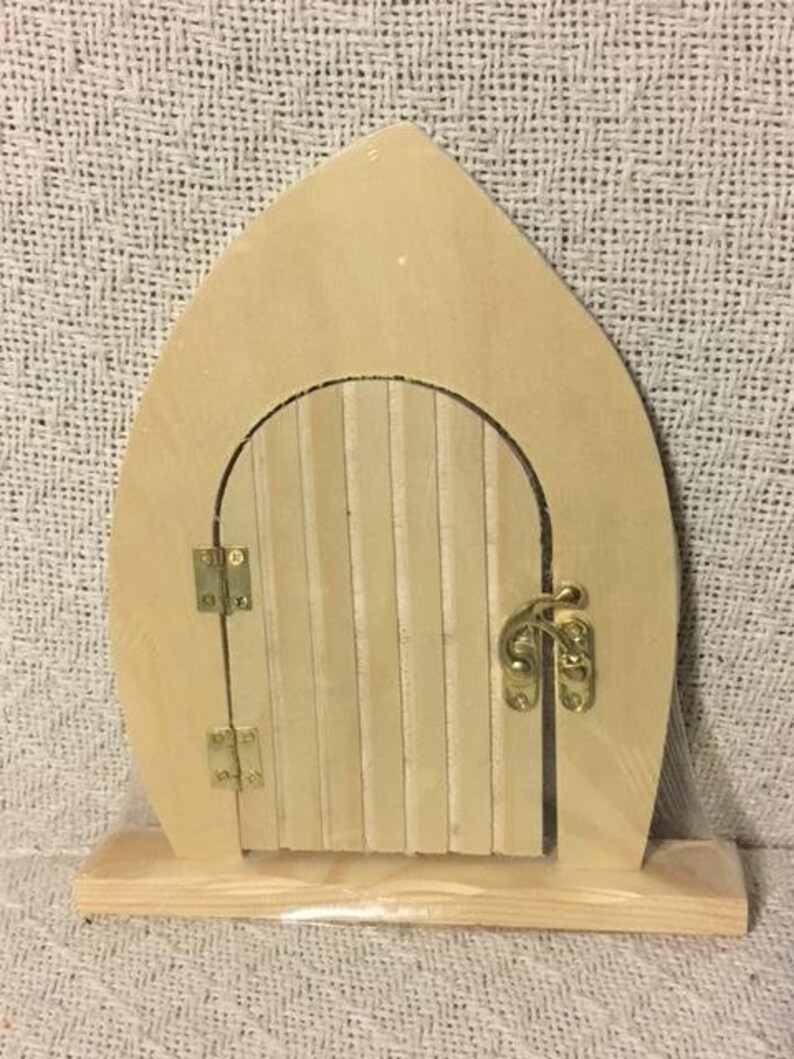
First, you need your own blank, undecorated fairy door. A wood version is best as it will be more lasting than a cardboard door. Look for one that stands by itself (many are flat and don't) and one that is hinged because it is even more appealing and magical to be able to actually open your door and look through.
You may be able to find fairy door blanks in your local craft store but the best selection I found is at Etsy. Before ordering an undecorated fairy door online, do check that the size is what you want for your chosen display area.

Image Credit: photo belongs to the author.
The first thing I did was to paint my wood door blank. I chose black acrylic paint for the door section and a dark gray acrylic paint for the surround because I knew exactly what look I was going for with the witch theme.
You could just paint the front of your door to save time but I painted all sides so that people can look at it all around on display. I don't advise putting these decorated doors outside as they will not weather too well. Mine is for an indoor Halloween display on a wooden shelf.
There are alternatives to painting. The plain blank wood doesn't really have much of a Halloween vibe so the light wood is best covered. You could use a wood stain, a dark varnish, a decoupage technique where you glue paper on top. Acrylic paint is simple to use and dries quite quickly so that's why I chose it.

Image Credit: photo belongs to the author.
Some fairy door blanks come with a window detail already on the door. Some are etched in place, made with plywood pieces or your window may even be cutout so you can see right through it. Mine did not have one so here's how I made my own.
Since I own a Sizzix Big Shot die cutting machine, it was very easy to cut a circle of silver card out with my circle framelit dies at Amazon.com and also at Amazon.co.uk. You could also hand-cut a circle using a round object as a guide or choose another shape to cut for a window piece. A circle worked best in my instance.
I then die cut a spiderweb from dark gray glitter card which makes a good contrast over the top of the silver circle when you glue it in place. Regular white glue with a thin nozzle applicator works fine.
I also added some frayed white tissue paper on top of the silver mirror card and underneath the spiderweb die cut. You can see this better a few photos down. This added detail makes the door window look like it has clouded up with age from a distance.
You can draw on a cobweb detail instead if you do not have a die cutting machine or cannot cut your own spiderweb small enough.
I'm using the small spiderweb die from the Spooky Halloween Sizzix Thinlits die set. I got mine from Amazon.co.uk. This is a great little set of dies for Halloween and especially good for making cards, scrapbooks and small decorations.

Image Credit: photo belongs to the author.
After sticking the window detail to the Halloween fairy door, I added in a surround to stop the window look like it is just floating. Using some thick string (wool, twine are perfect) I glued this around the circular window - not too neatly as this is a witch's house.
The string can be glued down using a regular white glue that should dry clear when done. Hot glue can leave messy blobs if you are not careful with it.

Image Credit: photo belongs to the author.
You can see that just by painting over the top of the string with a medium brown acrylic paint gives it a look of twisted wood surrounding the cobweb window area. It makes a nice detail and fits with the overall witch theme that I'm going for.
Think about the details that you want to add to your own Halloween fairy door to make it truly unique and your own - not just a carbon copy of someone else's design. The details do make for a better display item and one that your guests can enjoy looking at during October.

Image Credit: photo belongs to the author.
I could have made the fairy door surround look as though it was brickwork or large cobbled stone that would fit with the witch theme. However I knew I was planning to add some detailed die cuts on top including flourishes and these look better on a plain backdrop.
Die cut pieces were used to make all of these elements including the Boo text, the decorative flourishes and flowers. I stuck to a limited color palette of black, purple, silver and gray to fit the scheme.
You can use stickers, paint, rhinestones, fabric and paper flowers and leaves and paper decorations to decorate all around your Halloween altered art door. If you don't have a die cutting machine, look at different scrapbook elements and even paper Halloween sets that you can use to cut decorative items from and easily glue into place.

Image Credit: photo belongs to the author.
As soon as I knew I was going with a witch theme for my DIY Halloween fairy door, I knew I had to have a broomstick parked outside.
A miniature broomstick is easy to make using a piece of thin wooden dowel rod or a cocktail stick depending on the size of your fairy door. You will also need some embroidery floss in brown for the smallest broomsticks or some wool for larger ones and some twine.
First paint or color the wooden dowel rod which has been cut to a realistic looking size for the fairy door - a broomstick that is way taller than the door section will look weird. I used acrylic paint which I built up in different shades of brown to give an aged look to the broomstick. You can also use a marker pen to color it in.

Image Credit: photo belongs to the author.
Once the colored wood dowel is dry, cut lots of pieces of twine to a length that would work for the broomstick bristles. These pieces should not be cut to exactly the same size as it will look unnatural for a witch's broomstick. Cut them to slightly different lengths.
Use a length of the brown embroidery floss or wool to tie the twine pieces around the bottom of the colored dowel rod. You can also use a hot glue gun or quick dry glue to fasten the twine pieces in place before tying the floss on. This gives you a basic broomstick.

Image Credit: photo belongs to the author.
Continue to decorate your Halloween door as you like. I glued the broomstick on to the side with a large black ribbon bow over the top. I added in some paper flowers, a die cut fence and some rhinestones.
I used related objects with the door once on display giving it a backdrop of a haunted forest coloring page, a cauldron made from die cuts, a potion bottle filled with glitter and a ceramic cat. I love how the finished piece came out just in time for Halloween!
Related Content You Should Also Love:
Page Last Updated:
With this make your own Halloween fairy door craft, you can create a wonderfully bewitching item to keep out on display. I show you how I make my own witch themed Halloween fairy door with plenty of photos for your enjoyment.
Be inspired with this fairy door alteration to make your own witch home for Halloween. Or, alternatively, take the process and techniques that are used here to create your own creepy house decoration befitting of October 31st.
Note: This post may contain affiliate links for which I can be compensated.
Make Your Own Halloween Fairy Door Craft
Image Credit: photo belongs to the author.
Make your very own Halloween fairy door decoration that you can display on a mantel, a shelf or a table top. Transforming a plain fairy door into a witch home like the one above is an easy altered art craft that adults and older kids can enjoy.
I chose a witch theme for my design but there are plenty of other themes that you can go with for this seasonal occasion. Use this photo tutorial to gather lots of ideas on how to make your very own Halloween door.
Your altered fairy door blank could be transformed into a haunted house with ghosts and ghouls, a creepy castle, a zombie hideout, a wicked wizard's keep and so much more. Enjoy this Halloween craft tutorial and get inspired.
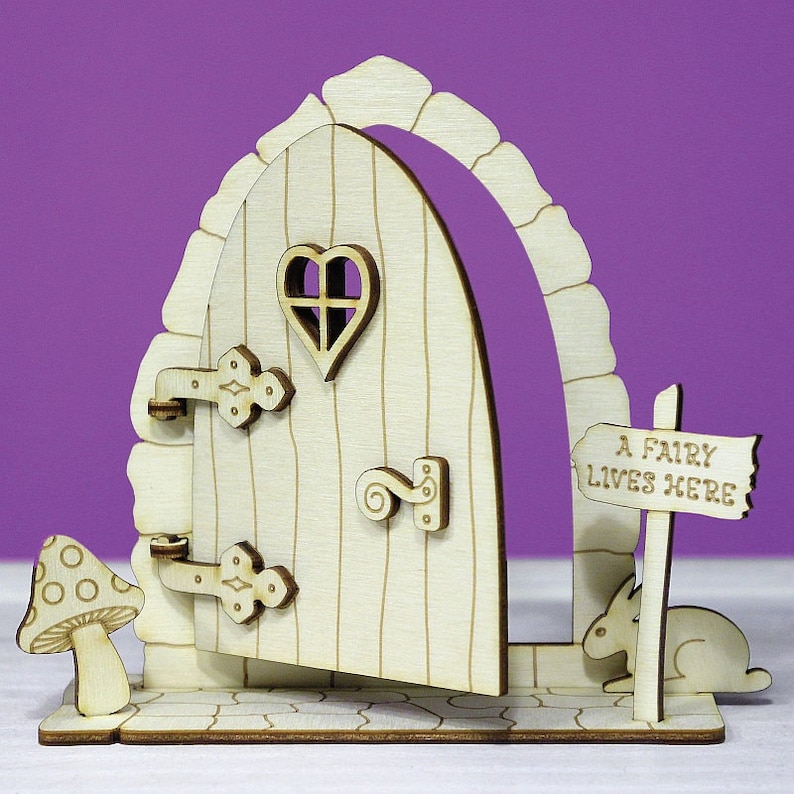

First, you need your own blank, undecorated fairy door. A wood version is best as it will be more lasting than a cardboard door. Look for one that stands by itself (many are flat and don't) and one that is hinged because it is even more appealing and magical to be able to actually open your door and look through.
You may be able to find fairy door blanks in your local craft store but the best selection I found is at Etsy. Before ordering an undecorated fairy door online, do check that the size is what you want for your chosen display area.
Step 1: Painting the Wooden Fairy Door
Image Credit: photo belongs to the author.
The first thing I did was to paint my wood door blank. I chose black acrylic paint for the door section and a dark gray acrylic paint for the surround because I knew exactly what look I was going for with the witch theme.
You could just paint the front of your door to save time but I painted all sides so that people can look at it all around on display. I don't advise putting these decorated doors outside as they will not weather too well. Mine is for an indoor Halloween display on a wooden shelf.
There are alternatives to painting. The plain blank wood doesn't really have much of a Halloween vibe so the light wood is best covered. You could use a wood stain, a dark varnish, a decoupage technique where you glue paper on top. Acrylic paint is simple to use and dries quite quickly so that's why I chose it.
Step 2: Adding a Spiderweb Window Detail
Image Credit: photo belongs to the author.
Some fairy door blanks come with a window detail already on the door. Some are etched in place, made with plywood pieces or your window may even be cutout so you can see right through it. Mine did not have one so here's how I made my own.
Since I own a Sizzix Big Shot die cutting machine, it was very easy to cut a circle of silver card out with my circle framelit dies at Amazon.com and also at Amazon.co.uk. You could also hand-cut a circle using a round object as a guide or choose another shape to cut for a window piece. A circle worked best in my instance.
I then die cut a spiderweb from dark gray glitter card which makes a good contrast over the top of the silver circle when you glue it in place. Regular white glue with a thin nozzle applicator works fine.
I also added some frayed white tissue paper on top of the silver mirror card and underneath the spiderweb die cut. You can see this better a few photos down. This added detail makes the door window look like it has clouded up with age from a distance.
You can draw on a cobweb detail instead if you do not have a die cutting machine or cannot cut your own spiderweb small enough.
I'm using the small spiderweb die from the Spooky Halloween Sizzix Thinlits die set. I got mine from Amazon.co.uk. This is a great little set of dies for Halloween and especially good for making cards, scrapbooks and small decorations.
Image Credit: photo belongs to the author.
After sticking the window detail to the Halloween fairy door, I added in a surround to stop the window look like it is just floating. Using some thick string (wool, twine are perfect) I glued this around the circular window - not too neatly as this is a witch's house.
The string can be glued down using a regular white glue that should dry clear when done. Hot glue can leave messy blobs if you are not careful with it.
Image Credit: photo belongs to the author.
You can see that just by painting over the top of the string with a medium brown acrylic paint gives it a look of twisted wood surrounding the cobweb window area. It makes a nice detail and fits with the overall witch theme that I'm going for.
Think about the details that you want to add to your own Halloween fairy door to make it truly unique and your own - not just a carbon copy of someone else's design. The details do make for a better display item and one that your guests can enjoy looking at during October.
Step 3: Decorating the Fairy Halloween Door Surround
Image Credit: photo belongs to the author.
I could have made the fairy door surround look as though it was brickwork or large cobbled stone that would fit with the witch theme. However I knew I was planning to add some detailed die cuts on top including flourishes and these look better on a plain backdrop.
Die cut pieces were used to make all of these elements including the Boo text, the decorative flourishes and flowers. I stuck to a limited color palette of black, purple, silver and gray to fit the scheme.
You can use stickers, paint, rhinestones, fabric and paper flowers and leaves and paper decorations to decorate all around your Halloween altered art door. If you don't have a die cutting machine, look at different scrapbook elements and even paper Halloween sets that you can use to cut decorative items from and easily glue into place.
Step 4: Making a Witch Broomstick to Park Outside Your Door
Image Credit: photo belongs to the author.
As soon as I knew I was going with a witch theme for my DIY Halloween fairy door, I knew I had to have a broomstick parked outside.
A miniature broomstick is easy to make using a piece of thin wooden dowel rod or a cocktail stick depending on the size of your fairy door. You will also need some embroidery floss in brown for the smallest broomsticks or some wool for larger ones and some twine.
First paint or color the wooden dowel rod which has been cut to a realistic looking size for the fairy door - a broomstick that is way taller than the door section will look weird. I used acrylic paint which I built up in different shades of brown to give an aged look to the broomstick. You can also use a marker pen to color it in.
Image Credit: photo belongs to the author.
Once the colored wood dowel is dry, cut lots of pieces of twine to a length that would work for the broomstick bristles. These pieces should not be cut to exactly the same size as it will look unnatural for a witch's broomstick. Cut them to slightly different lengths.
Use a length of the brown embroidery floss or wool to tie the twine pieces around the bottom of the colored dowel rod. You can also use a hot glue gun or quick dry glue to fasten the twine pieces in place before tying the floss on. This gives you a basic broomstick.
Finished Witch House Halloween Fairy Door Design
Image Credit: photo belongs to the author.
Continue to decorate your Halloween door as you like. I glued the broomstick on to the side with a large black ribbon bow over the top. I added in some paper flowers, a die cut fence and some rhinestones.
I used related objects with the door once on display giving it a backdrop of a haunted forest coloring page, a cauldron made from die cuts, a potion bottle filled with glitter and a ceramic cat. I love how the finished piece came out just in time for Halloween!
Related Content You Should Also Love:
DIY Witch Spell Book Tutorial
Witch Tulle Wreath How To
Halloween Potion Bottle Labels to Print
Witch Themed Decorations for Halloween
More Halloween Craft Tutorials
Witch Tulle Wreath How To
Halloween Potion Bottle Labels to Print
Witch Themed Decorations for Halloween
More Halloween Craft Tutorials
Page Last Updated:


Comments
Post a Comment
Just Halloween Crafts is a site dedicated to my favorite time of year and the whole spook time season that surrounds October 31st. I love to decorate the home with handmade, DIY and crafted items for Halloween as well as make costume accessories and do fun crafting activities. Using papercrafts, sewing with felt, no-sew techniques and more, you can create a wonderful scheme to your decor whether you are going for scary themes or more fun ones with pumpkins and more. Ghosts, witches, wizards and more make for fun crafting sessions. Thanks for leaving me a comment. Comments do not show until I approve them. Marie