Jello Brain Mold Recipe for Halloween
Jello (known as Jelly in the UK) is quick and easy to rustle up for parties, dinners and events and many kids and adults like to eat it. There are lots of fun shaped molds that you can buy for occasions such as Halloween.
One of my favorite molds is this brain shaped one which I've used a number of times and in different color combinations. Learn this fun Jello brain mold recipe to use for your Halloween entertaining and parties.
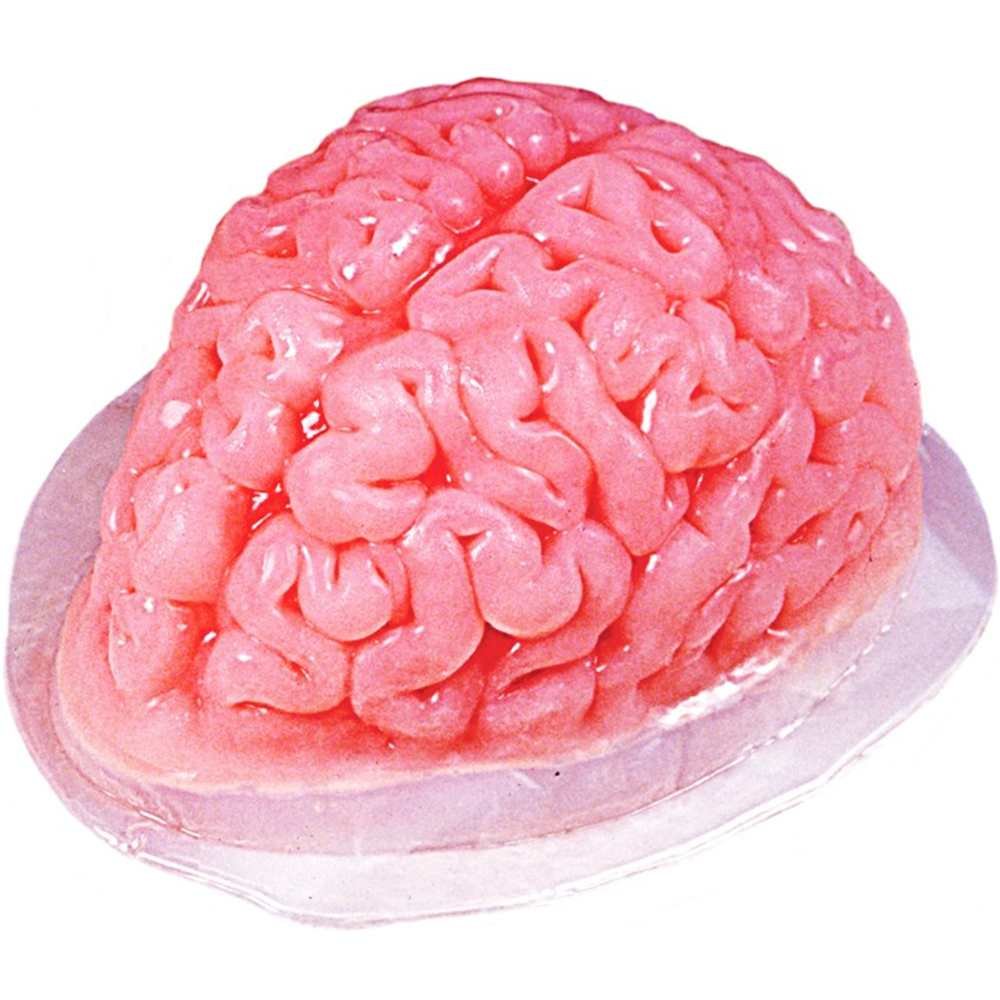
Solid colors look fine but by adding evaporated milk into the mix, you can turn your plain translucent Jello into something that looks more like real flesh. I managed to get this rather two-tone effect with mine which looked pretty cool.
Note: This post may contain affiliate links for which I can be compensated.

You can quite easily make a solid color up in the mold. Depending on the size of the actual mold you buy, you'll normally need to make up 2-3 standard sized packets to fill the container.

The basic items you need to make your creepy Halloween Jello brain.
How to make a creepy jello brain for Halloween: recipe and instructions. First find a bowl or basin that your mold will stand up in so that the gelatin can set level. The problem with these particular molds is that they don't stand level on their own. So get prepared first.
Next spray a little cooking oil or vegetable oil inside the mold which will help when you come to release it when it is set. Try and wipe or spray it all round the inside. Sit the mold inside the bowl to keep it still while you do this.


You'll normally need 2-3 same flavor packets of Jello or Jelly cubes because these gelatin brain molds can be quite large.
Red and pinks make rather gross colors for this part of human body and you can get reddish shades with a number of flavors such as strawberry, raspberry and cherry.
I used raspberry with this example which turned to pink with the addition of some evaporated tinned milk.
You need to make the first packet up exactly to the manufacturer's instructions. Here in the UK, we normally dissolve a packet of cubes in roughly 1/2 a pint of boiling water, then add another 1/2 pint of cold water once the cubes are all dissolved into liquid.
So make up the first packet as per normal and tip it into the bottom of the mold. This will give you a nice red bloodied color if you used a flavor like strawberry or cherry. I used raspberry which looked surprisingly good but more on the pink side.
Note: If you want to keep the two different colors very separate from each other, you may need to let the first jello set or almost set before pouring the second color in.

The brain mold sitting inside a large bowl to keep it all still while the mixture hardens.
Now you're going to make up the next packet but you need to do this one a little differently. Mix the cubes or gelatin in boiling water as you would normally until it is all dissolved. However, instead of adding the next part with cold water, here's where you use evaporated milk instead.
I used a small tin of evaporated milk which is approximately 170g in total.
Apparently the fat free kind is best. I've not tried that but you might want to. When you pour in the evaporated milk, the mix should go a nice pink color. Pour this into the mold. Do not stir inside the brain mold, just pour it on top of the previous mix.
Depending on the size of the mold you have, you may need to add in another packet of Jello to fill it all. If you do, follow the same directions as with step 3.
Now set the gelatin by popping the whole thing into a refrigerator. I normally let mine set overnight or I will make them up in the morning if needed for the afternoon or evening.

The completed Jello brain with blood red at the top and flesh pink towards the bottom. You can decorate this further by adding gummy worms around the outside and some red strawberry sauce on top for a more bloodied look.
Once set, the hardest part is removing it in one nice piece from the mold. If you greased this with some oil as stated at the start, this process is easier. Here's how I do it.
I get a flat plate and pop this on top of the mold before carefully flipping the mold and plate over together so the plate's at the bottom.
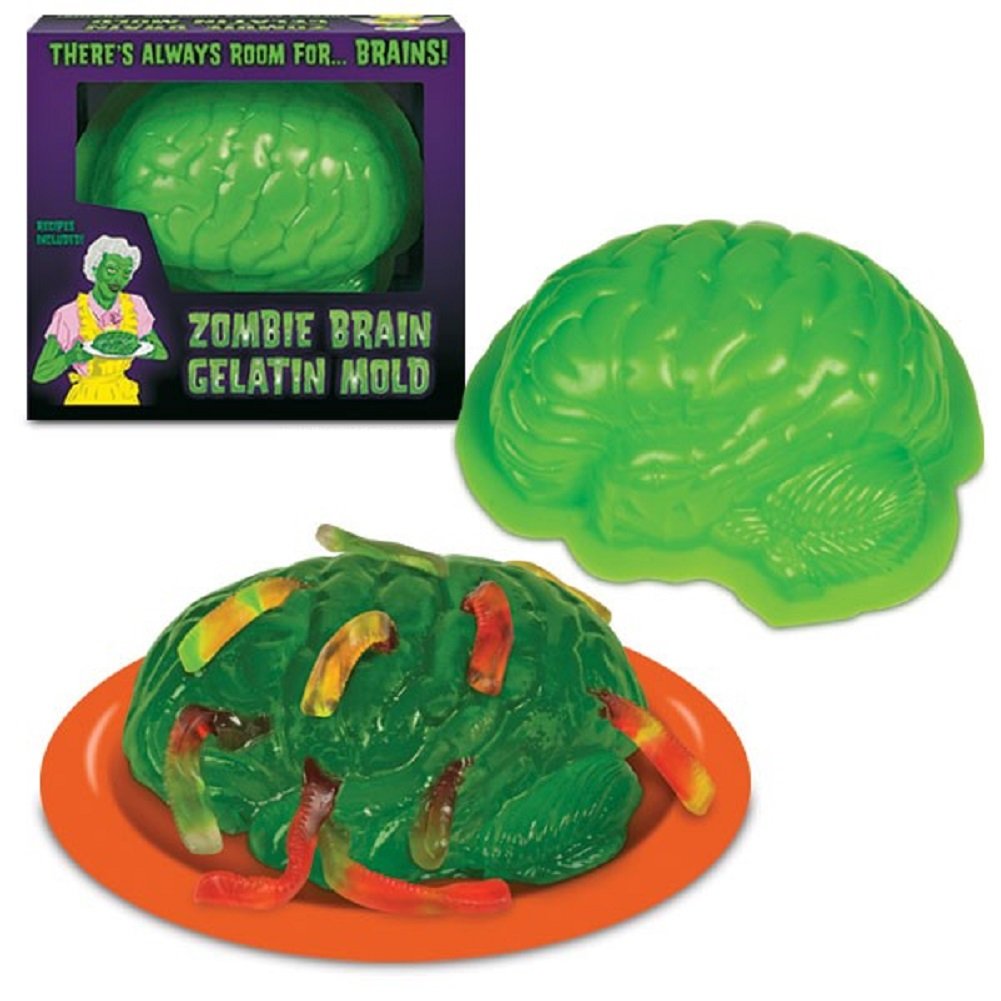
More Creepy Jello Molds for Halloween
Sometimes the set gelatin will just come out and sometimes it takes a little time to slip out from the container. An adult can help this process along by putting on some rubber gloves to protect their hands and wiping the outside of the mold with a cloth dipped in boiling water.
The heat will help the gelatin to shrink away from the sides of the container and slip down onto the plate.
Now you have an interesting looking bloodied brain that you can use and decorate in a variety of ways. Is this something you fancy trying out for your Halloween food? Let me know in the comments below.
Related Crafts and Posts You Should Also Love
Page Last Updated:
One of my favorite molds is this brain shaped one which I've used a number of times and in different color combinations. Learn this fun Jello brain mold recipe to use for your Halloween entertaining and parties.
Solid colors look fine but by adding evaporated milk into the mix, you can turn your plain translucent Jello into something that looks more like real flesh. I managed to get this rather two-tone effect with mine which looked pretty cool.
Note: This post may contain affiliate links for which I can be compensated.
Fun Jello Brain Mold Recipe for a Gruesome Looking Halloween Dessert
You can quite easily make a solid color up in the mold. Depending on the size of the actual mold you buy, you'll normally need to make up 2-3 standard sized packets to fill the container.
Ingredients and Materials Needed to Make the Jello Brain:
- 1 brain shaped gelatin mold at Amazon.com and also at Amazon.co.uk
- 1 bowl that the mold will stand up in until the gelatin sets
- 2-3 packs of standard 6oz sized Jello packs (2-3 Jelly cube packs UK)
- Boiling water
- 1 small tin of evaporated milk 170g approx (optional)
- Vegetable oil or spray for inside of mold
The basic items you need to make your creepy Halloween Jello brain.
Step 1: Preparing Your Brain Mold
How to make a creepy jello brain for Halloween: recipe and instructions. First find a bowl or basin that your mold will stand up in so that the gelatin can set level. The problem with these particular molds is that they don't stand level on their own. So get prepared first.
Next spray a little cooking oil or vegetable oil inside the mold which will help when you come to release it when it is set. Try and wipe or spray it all round the inside. Sit the mold inside the bowl to keep it still while you do this.

Step 2: Making Up a Blood Red Jello Mixture
You'll normally need 2-3 same flavor packets of Jello or Jelly cubes because these gelatin brain molds can be quite large.
Red and pinks make rather gross colors for this part of human body and you can get reddish shades with a number of flavors such as strawberry, raspberry and cherry.
I used raspberry with this example which turned to pink with the addition of some evaporated tinned milk.
You need to make the first packet up exactly to the manufacturer's instructions. Here in the UK, we normally dissolve a packet of cubes in roughly 1/2 a pint of boiling water, then add another 1/2 pint of cold water once the cubes are all dissolved into liquid.
So make up the first packet as per normal and tip it into the bottom of the mold. This will give you a nice red bloodied color if you used a flavor like strawberry or cherry. I used raspberry which looked surprisingly good but more on the pink side.
Step 3: Making a Flesh Color Jello for the Brain
Note: If you want to keep the two different colors very separate from each other, you may need to let the first jello set or almost set before pouring the second color in.
The brain mold sitting inside a large bowl to keep it all still while the mixture hardens.
Now you're going to make up the next packet but you need to do this one a little differently. Mix the cubes or gelatin in boiling water as you would normally until it is all dissolved. However, instead of adding the next part with cold water, here's where you use evaporated milk instead.
I used a small tin of evaporated milk which is approximately 170g in total.
Apparently the fat free kind is best. I've not tried that but you might want to. When you pour in the evaporated milk, the mix should go a nice pink color. Pour this into the mold. Do not stir inside the brain mold, just pour it on top of the previous mix.
Step 4: Add More Jello if the Mold is Large
Depending on the size of the mold you have, you may need to add in another packet of Jello to fill it all. If you do, follow the same directions as with step 3.
Step 5: Set the Gelatin
Now set the gelatin by popping the whole thing into a refrigerator. I normally let mine set overnight or I will make them up in the morning if needed for the afternoon or evening.
Step 6: How to Remove Jello from the Mold
The completed Jello brain with blood red at the top and flesh pink towards the bottom. You can decorate this further by adding gummy worms around the outside and some red strawberry sauce on top for a more bloodied look.
Once set, the hardest part is removing it in one nice piece from the mold. If you greased this with some oil as stated at the start, this process is easier. Here's how I do it.
I get a flat plate and pop this on top of the mold before carefully flipping the mold and plate over together so the plate's at the bottom.
More Creepy Jello Molds for Halloween
Sometimes the set gelatin will just come out and sometimes it takes a little time to slip out from the container. An adult can help this process along by putting on some rubber gloves to protect their hands and wiping the outside of the mold with a cloth dipped in boiling water.
The heat will help the gelatin to shrink away from the sides of the container and slip down onto the plate.
Now you have an interesting looking bloodied brain that you can use and decorate in a variety of ways. Is this something you fancy trying out for your Halloween food? Let me know in the comments below.
Related Crafts and Posts You Should Also Love
Now Make a Zombie Brain Trifle Pudding
Zombie Cupcake Decorating Ideas
Zombie Themed Kitchen Items
Decorating Ideas for Spider Themed Cupcakes
More Halloween Food Ideas
Zombie Cupcake Decorating Ideas
Zombie Themed Kitchen Items
Decorating Ideas for Spider Themed Cupcakes
More Halloween Food Ideas
Page Last Updated:


When I poured the second batch of jello, with evaporated milk added to it, into the bowl it blended with the first clear batch.
ReplyDeleteHow did you keep yours separate?
Hi Lisa. I can only assume that due to my normal slow speed with making things, the first batch had started to set firm before the second went in. That would certainly explain it.
DeleteI really wish I saw this prior to my annual Halloween dinner on the 29th. I was so excited to try out my new brain mold for the guests. Everything went well until it was time to remove it from the mold. Needless to say, I wound up with shattered brains instead. Will definitely use the oil spray ahead of time and the boiling water if needed. Thanks for sharing!
ReplyDeleteExactly how much of the evaporated milk did you use with one package of jello?
ReplyDeleteThe tin size was 170g and that was the amount used with 1 pack of jello. The evaporated milk was instead of adding the cold water. I have updated the post now to add that information in.
Delete