How to Sew a Cloak without a Pattern
My daughter needed a cloak for a school event and rather than go out and buy one I decided to make my own. I had a large piece of old green and gold curtain fabric that was ideal to use for this project.
Without having any pattern to follow, making the cloak all came down to measurements and guesswork but we got there in the end. Follow my post so you can see how to sew a cloak without having a pattern too.
This post explains how I made the hooded cloak from start to finish. Hopefully you will find this useful if you need to make up a DIY one in a hurry yourself. I worked out how it was done so you don't have to.
Note: This post may contain affiliate links for which I can be compensated.
How to Sew a Cloak Without Having a Pattern to Follow
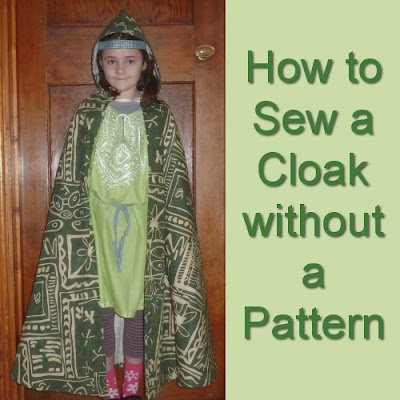
Note that this project is to make a simple, unlined cloak with a hood. It comes in just two pieces of fabric with the large cape section as one piece and the hood as another. You could also follow the instructions and leave out the hooded section to make an even easier hood-less cape.
I chose not to line this cloak because lining would have added to the complexity of making it as well as to the cost. For a quick costume piece, going to the expense and trouble of lining was not going to be worth the effort. The curtain fabric I picked out is also heavy enough as it is.
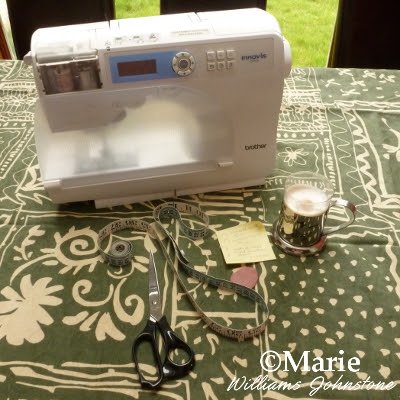
This was the essence of what I needed to make this project: a sewing machine (which incidentally broke down while making this project!) a measuring tape, fabric scissors, tailor's chalk, a large piece of fabric and a strong coffee or two.
Since I was working without a pattern, the measuring tape was pretty crucial to taking different measurements on my daughter to work out sizes needed. Luckily a had a huge piece of fabric to work with from an old curtain.
The longer and fuller you want a costume cloak to be, the more fabric you will need to use. A child's version is naturally going to require quite a bit less than an adult one.
Taking Some Costume Measurements:
Length of Cape: First you need to know what length you want this to be. Will it be a shorter cape or a long, flowing cloak.
We needed a long cloak so I measured from the top of the shoulder down to the ankles and came up with a 100 cm / 39 inch length after also adding on an inch for seam allowances. I will refer to this as Measurement A.
Fabric Size Estimates: So the size of your fabric for a hoodless version is going to be Measurement A for the Length x Measurement A Doubled for the Width. In our case we needed a piece of fabric that was a minimum of 100 cm / 39 inches long x 200 cm / 78 inches wide.
That measurement does not include making the hood for which we also needed another piece around 60 cm / 23 inches x 25 cm / 9 inches in size. This was for a very small sized 7 year old at the time of making. You'll probably want to allocate quite a bit more than that.
Collar / Neck Area: Measure very loosely around the neck area - you want the measuring tape to feel as loose as you'd like the finished collar area or neck section to be.
Once you've got this measurement, you need to halve it and also add on an inch for the seam allowance. This will be referred to as Measurement B.
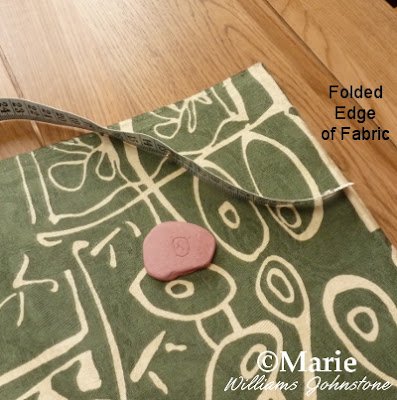
Once you've got your size of fabric sorted for the actual cloak section which is made from one continuous piece, you need to fold it in half. Do this by placing the fabric in front of you on a work surface with the wrong side up.
Have the longest side running across horizontally and the shortest side going up vertically. Take hold of the right side of this piece and pull it across to the left - line the fabric up and smooth it out. You now should have it folded in half with the right side of the material facing you.
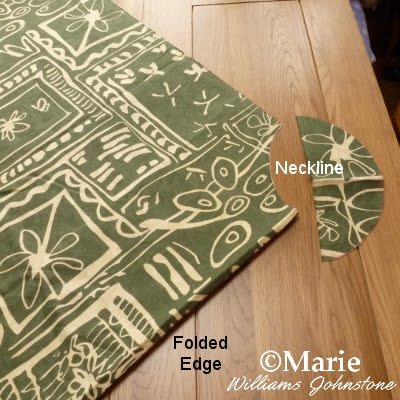
On the top right side where the folded edge is, is where you will mark and cut out the shape for the neck. Find Measurement B that you worked out for the neck area on the measuring tape.
Hold the top of the measuring tape on the corner of the fabric, and using Tailor's Chalk or a suitable fabric marker, mark off this measurement from the right side of the fold up to the top of the fabric.
You do this by keeping the top of the tape measure on the corner and gradually move the bottom edge across in an arc, marking the measurement off as you go. You should end up with a quarter circle shape which you then cut out. You can see this piece cut out in the photo above.
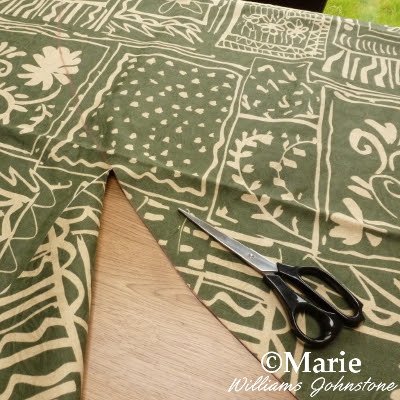
Now you need Measurement A which is the length of the cape. Use the same tape measure method to mark this measurement off from the right fold, up to the top of the fabric.
Like the neckline, it makes a quarter circle which you then cut out carefully bearing in mind this is folded so you are cutting through two layers. You now have the rough beginnings of a cloak cut out.
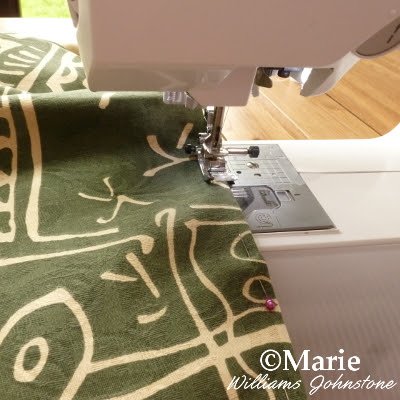
Now is the time to get sewing. It's best to use a zig zag stitch or an overcast stitch on all the raw edges of the cloak piece you just cut out to help avoid any fraying fabric later on. For a very rough DIY job, you can leave the edges as they are.
I did a basic hem down both sides and all along the bottom of the cloak. I turned over about half an inch of fabric to the wrong side and stitched a 1/4 inch seam using straight stitch to make a simple hem.
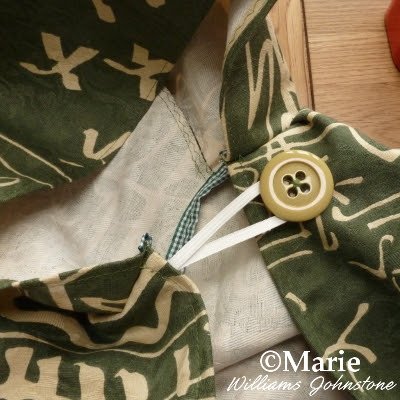
If you want a cape without a hood then simply hem along the neckline. You can add a clasp at the neck. I choose to add a big button on one side and a longish loop of elastic cord on the other which makes it easy for my daughter to put this on and off herself. The elastic cord also adds space for growth and movement too.
For Making a Hooded Cape:
First See How to Measure and Make the Hood Section
Next See How to Sew the Hood to the Cloak
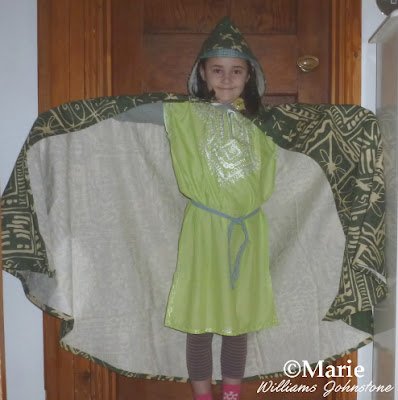
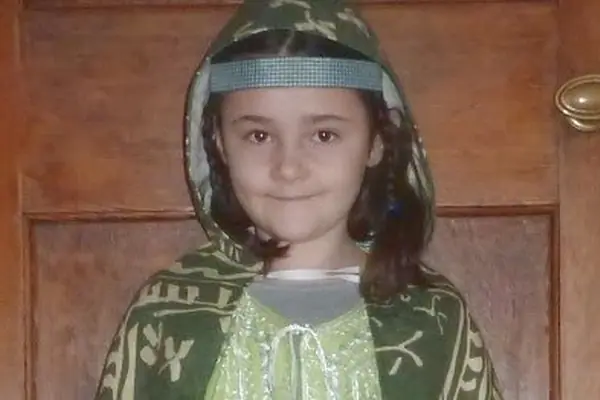
Here's the finished version. My daughter loves to wear this and mostly uses it to pretend she is a Hobbit from Middle Earth.
You can use this same technique to make a witches or wizard's cape, Vampire, super hero, Fantasy LOTR Elf, a character from Harry potter and so much more. I hope you've enjoyed reading my justhalloweencrafts page today, thanks for your visit. Any comments can be left below for me thank you.
Related Content You Should Also Love
Make a Hanging Felt Halloween Butterfly Decoration
Create an Easy No Sew Tulle Wreath
More Felt and Fabric Crafts
More Craft Tutorials
Quick Answers Before You Buy Fabric
Updated October 2026: fabric and no-sew tips added by the Just Halloween Crafts team.
What if my fabric is not wide enough?
Most dressmaking fabric is sold in widths of about 44 to 60 inches (112 to 150 cm). An adult floor-length cloak can need a piece wider than that. The simplest fix is to cut two pieces and join them with a seam down the center back, where it will hardly show once the cloak is worn. Old curtains and bed sheets, like the fabric used here, are often wide enough to cut the whole cloak in one piece.
Which fabric is easiest for a first cloak?
Fleece is the friendliest choice: it does not fray, so the hems can be left raw, and it is warm for outdoor trick or treating. Cotton drill or poplin is easy to sew but does not drape as dramatically. Velvet and satin look wonderful but slip and shift, so they are better once you have made one cloak already. Our guide to the best fabric for a cloak or cape goes into more detail.
Can I make the cloak without sewing?
Yes, if you use fleece or felt. Cut the shape exactly as described above, leave the edges raw and finish the neckline by snipping pairs of small slits about an inch apart and threading a ribbon through them as a drawstring. Fabric glue can also hold a folded hem in place, although it is not as hard-wearing as stitching.
How long should a child's cloak be?
Stop at the ankle or just above it. A cloak that touches the floor looks great in photos but is easy to trip over on steps and doorways, especially in the dark on Halloween night.
Want a hood? Follow the tutorial on how to make a hood for a cloak and then how to sew the hood onto the cape.
How to Sew a Cloak With a Hood
To sew a cloak with a hood, make the cloak body first, then sew a separate two-piece hood and stitch it to the neckline before you hem the front edges. The cloak above is cut as one large piece, so the hood is the only extra part, and it adds roughly an hour to the project.
- Cut and finish the cloak body exactly as described above, but leave the neckline raw for now.
- Measure from the base of the neck, over the top of the head, to the other side of the neck, and from the forehead to the back of the neck. Add room for movement and seam allowances, then cut two matching hood pieces. Our tutorial on how to make a hood for a cloak shows the shape and the measurements step by step.
- Sew the two hood pieces together along the curved back seam and hem the front edge of the hood (the edge that frames the face).
- Pin the open bottom edge of the hood to the cloak neckline, right sides together, matching the back seam of the hood to the center back of the cloak. Ease the fabric so it sits evenly, then stitch. The step-by-step photos in how to sew a hood onto a cape show this part.
- Finish the neckline seam with a zigzag stitch, then add ties, a ribbon or a clasp at the throat.
Prefer to follow the whole hooded project in one place, from measuring to the final clasp? Our step-by-step guide on how to make a hooded cloak covers the body, the hood, joining them and a troubleshooting table.
How to Make a Cloak Without a Hood
A cloak without a hood is the same project with one step left out: cut the body, finish the edges and add a fastening at the neck. Because there is no hood to hold the neckline in shape, it helps to make the neck a little snugger than for a hooded cloak, or to fold the neck edge over to make a channel and thread a ribbon through it as a drawstring. A stand-up collar, cut as a long rectangle of stiff fabric and stitched to the neckline, gives a hoodless cloak a more dramatic look for vampires and wizards.
More Cloak and Cape FAQs
How do you make a cloak without a pattern?
Take two measurements, the length from shoulder to ankle and the loose neck size, then fold a rectangle of fabric in half and mark two quarter circles from the folded corner: a small one for the neck and a large one for the length. Cut through both layers and you have a half-circle cloak ready to hem.
Is a cloak the same as a cape?
The words are often used interchangeably for costumes. In general a cape is shorter and hangs from the shoulders, while a cloak is longer, fuller and often has a hood. The method on this page works for both: change measurement A to make it shorter or longer.
Can I make a cloak with a hood without sewing?
Yes, with fleece or felt, which do not fray. Cut the body and hood as usual, then join the hood to the neckline with fabric glue or iron-on hemming tape, overlapping the edges by about an inch. Let the glue cure fully before wearing, and expect a sewn seam to last longer.