Pumpkin Trick or Treat Bag Felt Pattern
This post contains affiliate links. If you buy through them, the site may earn a small commission at no extra cost to you. Disclosure.
Quick answer: to sew a felt pumpkin trick or treat bag, cut three equal circles of orange felt, overlap two side by side and lay the third on top in the middle, then stitch them together. Trace that shape onto more felt for the back, add a green leaf and ribbon stem, sew the front to the back around the bottom and sides, and finish with ribbon handles.
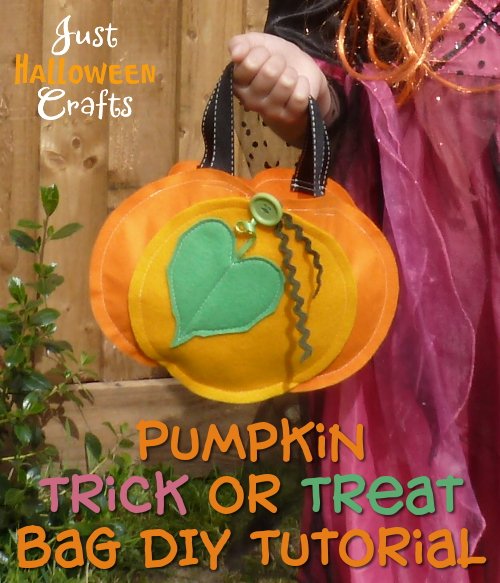
Pumpkins make a really cute motif for the Fall season. You can turn this widely recognized design into a really cute little pumpkin trick or treat bag that kids can carry around this Halloween.
This is an easy and inexpensive sewing project made using craft felt and you can either sew it by hand or use a sewing machine which is quicker and makes stronger seams to hold all the candy or loot.
If you're new to sewing and wondering whether you will be able to make a bag - you can. This is a simple, beginner project so more experienced sewers will find it a breeze. You can make this pattern as small or large as you like.
Note: This post may contain affiliate links for which I can be compensated.
Pumpkin Trick or Treat Bag Felt Pattern Tutorial
Materials and Tools Needed:
- Orange color acrylic craft felt in two different shades
- Green craft felt
- Assortment of ribbon
- Something round to trace around
- Water soluble fabric marker pen
- Scissors, threads, pins, needles, sewing machine or hand stitch
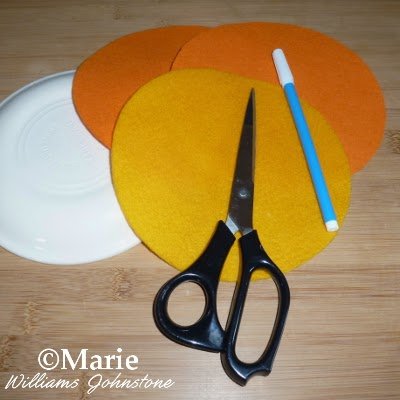
Step 1: The front of the bag is made from 3 circles which are all the exact same size. How large or small you cut these circles will affect the sizing of the completed item. The larger the circles, the larger the finished bag.
The width of the finished item is roughly equal to 1 whole circle plus a half circle. The height of the finished item will be the height of the circle - minus the handles you add on.
I used a salad plate to cut out my circles and this made a finished size that was cute for an eight year old child to hold. You can draw around a mug or a breakfast bowl to make a mini sized bag. Use a dinner plate or (better still) draw your own circle to make a much larger version.
The final size that you choose may well be dependent on the felt that you have and especially if it is in sheets rather than cut from a larger section off the bolt.
For this first step, use a water soluble fabric marker pen (or your choice of fabric marker) to draw out 3 circles of orange felt. Two circles in one shade if you have them and one in another. I used two darker oranges and one lighter shade. Be aware that you also need orange felt for the backing later on. Cut these circles out.
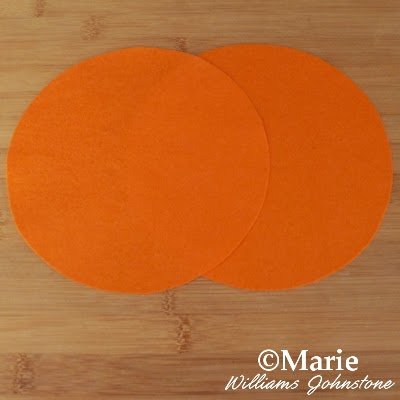
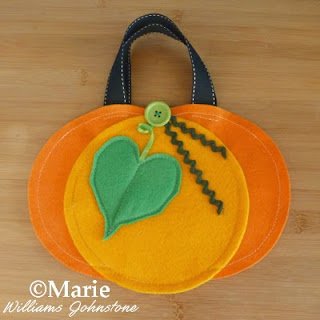
Step 2: With the two darker circles of orange felt, lay one down on your work surface and then overlap the second one on the left by placing the right edge roughly in the middle of the first felt circle. Your circles should be laid out like they are in the photo.
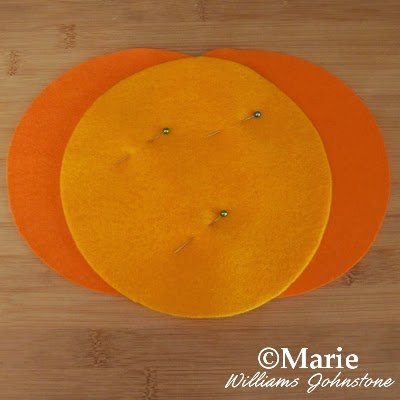
Step 3: Place your third piece of felt on top and in the middle of the other two, pulling it down just a little so you get that nice plump pumpkin shape. Pin in the middle ready to sew.
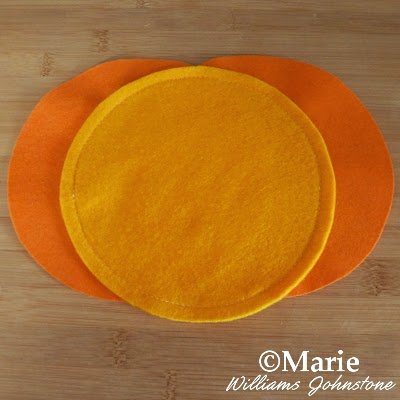
Step 4: I used my machine to sew a straight line in a cream color thread about 3/8 inch away from the edge. It doesn't matter too much on exactly where you sew away from the edge as long as you remember it for later on. This stitches all three front pieces together in one go. You can also do this by hand.

Step 5: Once your main section for the front is all sewn, you use it like a template to draw around on some more orange felt to make the back piece for the bag. Just lay it over some felt and trace around it with a fabric marker pen and then cut. Put the backing to one side for now.
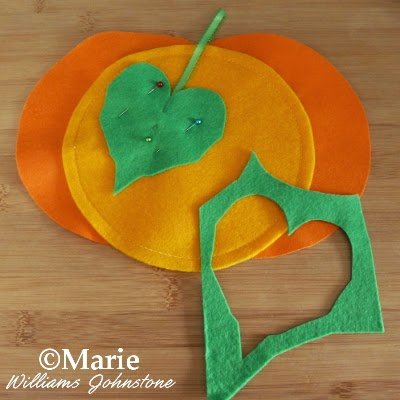
Step 6: Switching to the green felt, cut out a leaf shape. I made the leaf shape by drawing a heart shape and then cutting some straighter pieces along the sides to get a more angular leaf. You can just make a heart if it's easier.
Best way is to fold the green felt in half and draw half the heart shape and then cut it out. That's what I did. Pin the leaf on the front, I pinned it off to the left a little and sewed a piece of green ribbon under it (see below) to make the stem.
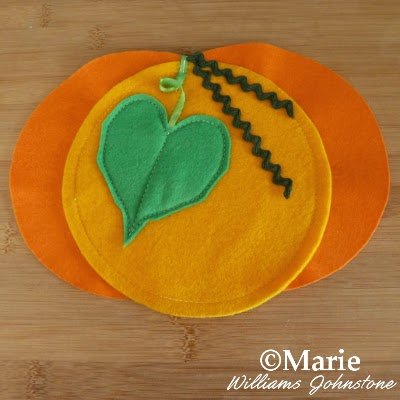
Step 7: To sew on the leaf, I pinned the ribbon for the stem under it and sewed down first from the top to the bottom of the leaf which secured the ribbon at one end and made a leaf vein. I then sewed all around the leaf, close to the edge about 1/4 inch away.
To make a twisty ribbon stem from the ribbon secured at one end under the leaf, I made a loop in the ribbon and then just sewed it at the top of the bag. I also added in some green rick rack trim which was folded in half and just stitched with green thread near the top so most of this dangles free.
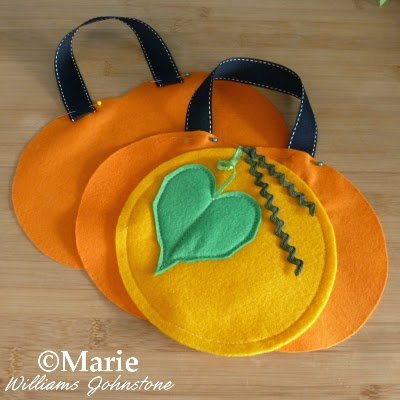
Step 8: The next stage is to pin the handles to the inside of both the front and back bag pieces. I used some wide and sturdy black grosgrain ribbon. You could also use a length of black felt for each handle which has been folded in half lengthwise and sewn along the open edge.
To pin the handles, I first choose where to pin on the front bag piece and then I pin each end to the inside of the fabric, tucking the raw end of the ribbon under so that will be stitched in place as well. It does take a little time to get the handle pinned in place where you want it so take your time over this part.
Once you've securely pinned the handle on the front of the bag, you then need to pin the other handle on the back section. Remember that you pin the handle ends on the inside where they will not show on the finished piece.
You want both handles to be pinned in roughly the same position on each piece plus you also want the handles to end up being the same length. I place the front of the bag over the bottom to check and adjust the pinning as necessary.
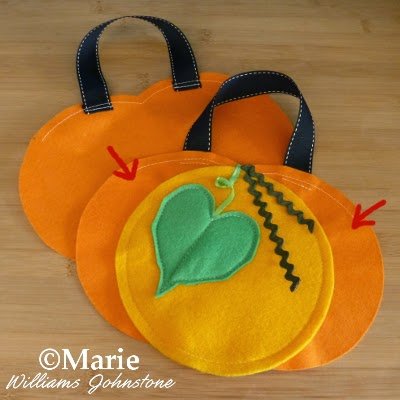
Step 9: Now we want to sew the handles in place. I've made some red arrows in this photo above which give you a rough idea of where you need to sew between. You're aiming to sew along the top edge where the bag will stay open once it is finished.
Earlier on in step four I mentioned remembering how far you sewed from the edge. I sewed around 3/8th's of an inch away and that's the same as I used here. Sew all along the top edge only first on the front piece and then on the back piece. I also made some extra stitches over the handle sections only to secure them down really well.
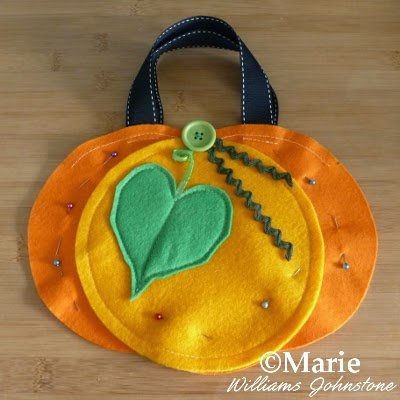
Step 10: Next pin the wrong sides of your bag together so the insides are sandwiched together in the middle. Now you can sew all around the sides and bottom edges to secure your bag together. I started sewing, continuing the straight line from towards the top of the right edge, right around up to where the stitching is on the top left.
You probably want to do a few reverse stitches at the start and end to reinforce those sections. I sewed a green button on to add in some extra detail - it's sewn to the front only as decoration.
Step 11: This photo shows where all the stitch lines are. I just used a straight stitch with a cream thread. You can have lots of fun with this simple design by adding in some other fabrics for the leaf and perhaps using a zig zag stitch or blanket stitch to applique that on.
You could even do a bit of quilting using this whole idea. See where the mood takes you. I hope you've enjoyed reading my justhalloweencrafts page today, thanks for your visit. If you make one of these, let me know because I'd love to see your version.
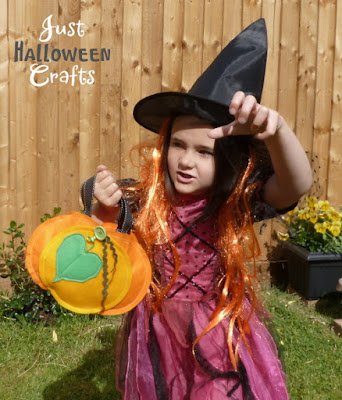
You may want to rustle up some mini favor bags, a costume accessory for a child this Halloween or a large trick or treat holder. You can easily adapt the scale using my instructions.
Related Content You Should Also Love:
DIY Felt Halloween Butterfly Silhouette
Create a Fabric Pom Pom Wand
More Halloween Felt Crafts
Pumpkin Bag Size Guide
Updated October 2026: size guide, sewing tips and FAQ added by the Just Halloween Crafts team.
The circle you trace decides the size of the bag. As the steps above explain, the finished bag is about one and a half circles wide and about one circle tall, not counting the handles. Measure your plate or bowl across the middle and use this as a guide:
| Circle traced around | Typical circle size | Finished bag (approx.) | Good for |
|---|---|---|---|
| Mug | 3 to 4 in (8 to 10 cm) | 5 to 6 in wide | Party favor bags |
| Cereal bowl | 6 in (15 cm) | About 9 in wide | Toddlers and preschoolers |
| Salad plate | 7 to 8 in (18 to 20 cm) | About 11 in wide | Children up to about eight |
| Dinner plate | 10 to 11 in (25 to 28 cm) | About 15 in wide | Older children and big candy hauls |
Craft felt is often sold in 9 by 12 inch sheets, so circles larger than about 8 inches need felt cut from a roll or bolt.
Tips for a Stronger Pumpkin Bag
- Use a machine or backstitch: a sewing machine makes the strongest seams. By hand, use a backstitch rather than a running stitch for the seams that carry the weight.
- Reinforce the handles: sew each handle end with a small square of stitches with an X through it, and place the handles inside the top edge so the stitches aren't pulled outward.
- Choose thicker felt: thin acrylic craft felt stretches when the bag is full. Wool-blend or stiffened felt holds its shape better.
- Add a lining: cut the same shape from cotton fabric, sew it into a pocket and slip it inside the bag before you stitch the top edge. It stops the felt from stretching and keeps wrappers from catching.
- No-sew option: for a decoration or a light party favor bag, glue the layers with fabric glue and let it dry fully. Glued bags are not strong enough for a full night of trick-or-treating.
For trick-or-treating after dark, add a strip of reflective tape to the back of the bag. Want more felt projects? Try our felt Halloween finger puppets, see more treat and favor bags, or make a matching costume with our no-sew cloak guide.
Pumpkin Trick or Treat Bag FAQ
What felt is best for a trick or treat bag?
Thicker felt makes the best trick or treat bag because it holds its shape and doesn't stretch when the bag is full. Wool-blend or stiffened craft felt works well. Thin acrylic felt is fine for small favor bags, or you can add a cotton lining to make it stronger.
Can I sew this pumpkin bag by hand?
Yes. Every step can be sewn by hand with a needle and thread. Use a backstitch for the side seams and handles, because it is much stronger than a running stitch, and sew the leaf and trim with a simple running or blanket stitch.
How do I make the pumpkin bag bigger?
Trace a bigger circle. The finished bag is roughly one and a half circles wide and one circle tall, so a dinner plate makes a bag big enough for older children. Larger circles need felt from a roll, since standard craft sheets are too small.