How to Sew a Hood onto a Cape
This post contains affiliate links. If you buy through them, the site may earn a small commission at no extra cost to you. Disclosure.
Quick answer: to attach a hood to a cape, find the middle of the hood's bottom edge and the middle of the cape's neckline, pin them together right sides facing, then pin outward to each front edge, easing or tucking any extra fabric. Sew along the pinned line with a straight stitch, and cover the seam with ribbon if you want a neat finish inside.
So you've rustled up a quick hood for a costume (tutorial provided in this post if needs be) and now you may be wondering how on earth you sew it to a cape to make a hooded cloak.
This photo tutorial gives you a good guide on how to attach a hood onto a cape or cloak which has no fancy extras such as lining. You'll see how I did it with photos provided.
Not everyone wants to go to the time, bother and extra fabric expense to line a costume or dress up cloak when it may only be worn a few times for Halloween. I certainly didn't. Here's how it is done.
Note: This post may contain affiliate links for which I can be compensated.
How to Sew a Hood onto a Cape or Cloak
First, if you need a tutorial on making a hood, head on over here where I explain how to make this:
🎃 How to Sew a Basic Cloak Hood without having a Pattern
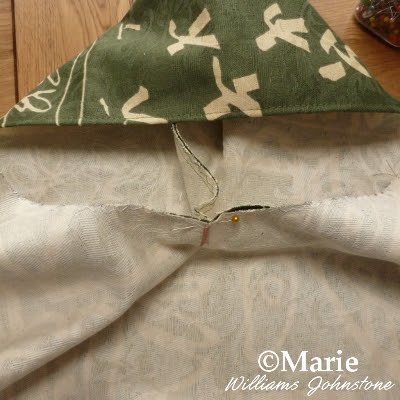
Step 1: Find the middle point of your hood across the bottom seam. If you made your hood using my instructions above this will be easy because the middle point is where the sewn seam runs from bottom to top.
You may, otherwise, need to fold the hood vertically to find and mark off the middle point on the inside of the fabric.
Next you need to find the middle point on the neck of your cape. Fold the collar area in half to find where the middle is. Mark this off using tailor's chalk or a water soluble fabric pen.
Match up the mid point on the inside of the hood to the mid point of the neck area on the cape and pin as shown.
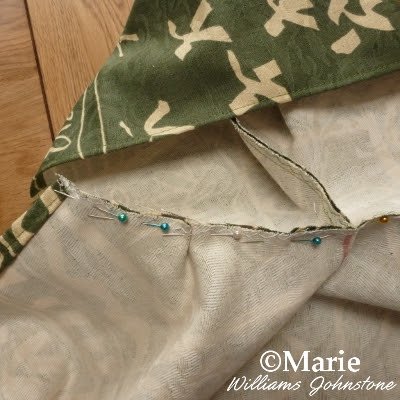
Step 2: Next pin the very left of the bottom of the hood to the left of the neck on the cape. I pin about 1/4 inch down from the edges of the fabric. Now pin all in between these points.
You will probably need to gather some material or fabric on either the neck or the hood (whichever is bigger than the other) to get the two pieces to fit.
You should be able to see in the photo that I just needed to make a small tuck in the middle of this left side to fit the pieces together neatly. Repeat on the right side of the hood with the pinning.
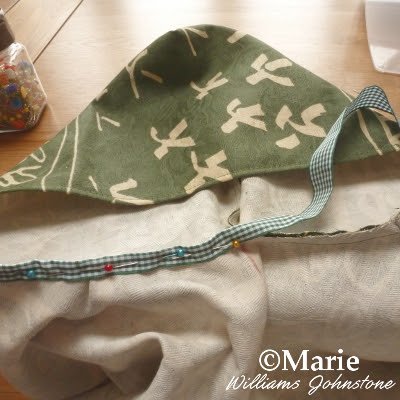
Step 3: Once your hood and neck area are all pinned together, you can just use a straight stitch to sew them together.
It leaves a seam showing on the inside of the cloak where you have joined the hood to the cape. This may or may not matter to you.
A quick way to hide this seam if it bothers you is to sew some decorative ribbon over the top.
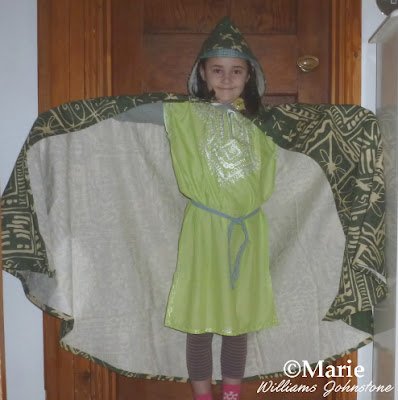
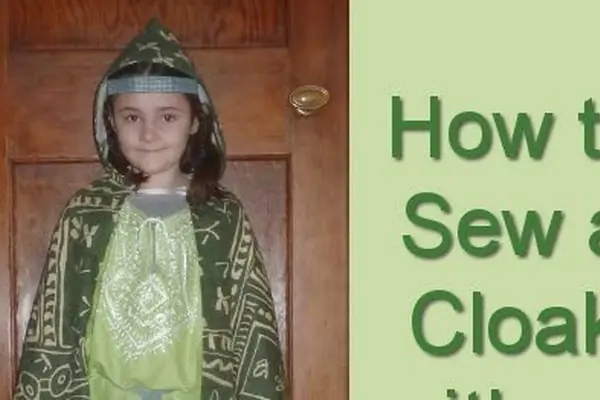
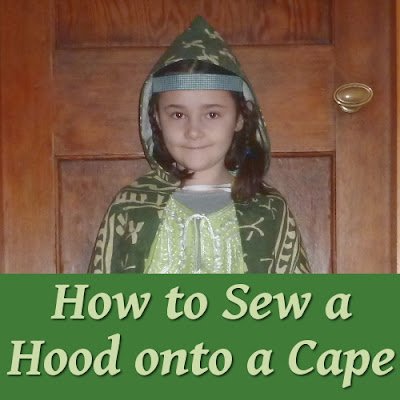
Here's my daughter showing off the quick hooded cloak I sewed for her. It was made from a thick curtain fabric that I had spare.
🎃 See How to Make the Rest of the Cloak Here
The cloak was great for the costume she needed for school and also has been worn on numerous occasions since with her dressing up as a Hobbit, Elves and even an Anglo Saxon. Making it without a pattern was thankfully not as hard as I anticipated.
Related Content You Should Also Love:
Extra Tips for Attaching a Hood Neatly
Updated October 2026: extra tips and fixes added by the Just Halloween Crafts team.
The three steps above are all you need for a quick costume. If you want the join to look a little more polished, or the hood is not sitting quite right, these extra steps help.
- Compare the two edges before pinning. Measure the bottom edge of the hood and the neckline of the cape. A difference of an inch (2 to 3 cm) is easy to ease in. If the hood is much wider, take a slightly deeper seam at the center back of the hood or fold two small pleats on either side of the center point.
- Stay-stitch the cape neckline. Sew a line of straight stitching about 3/8 inch (1 cm) inside the curved neck edge before you pin. Curved edges stretch when they are handled, and this stops the neckline from growing out of shape.
- Tack it first. Run a line of long, loose hand stitches along the pinned seam and try the cloak on. It is much easier to adjust a tacked seam than to unpick machine stitching.
- Clip the curve. After sewing, snip into the seam allowance every inch or so, stopping just short of the stitching. This lets the curved seam lie flat instead of puckering.
- Finish the raw edges. Zigzag or overlock the two layers of seam allowance together, press them towards the cape, then topstitch close to the seam. Covering the seam with ribbon or bias binding, as mentioned above, also gives a tidy finish.
- Add a fastening. Sew ribbon ties, a large hook and eye or a decorative cloak clasp at the front corners of the neckline. For young children, choose a hook and eye or hook-and-loop tape rather than long ties around the neck.
Common Problems and Quick Fixes
- The hood pulls backwards and tugs at the throat. The hood is too shallow from front to back. Make a new hood with a larger front-to-back measurement, or add a strip of fabric along the front edge.
- The hood falls over the eyes. It is deeper than needed. Fold back a cuff along the front edge and stitch it in place, or take a tuck at the top of the back seam.
- There are small puckers along the seam. The extra fabric was not spread evenly. Unpick just that section, redistribute the pins and sew it again.
Heavy fabrics such as curtain material, velvet and fleece drape well but are bulkier at the seams, so trim the seam allowance a little before finishing. For more help choosing material, see the best fabric for a cloak or cape.
Finish the Neckline: Add a Closure
Updated October 2026: closure, seam-finishing tips and FAQ added by the Just Halloween Crafts team.
Once the hood is on, the cloak needs a way to close at the front. Sew it just below the hood seam so the hood can fall back freely. Fabric ties are the quickest, a metal cloak clasp or frog closure gives a fantasy look, and a hook-and-loop tab is safest for children because it pulls apart if the cloak gets caught. Our guide on how to fasten a cloak or cape shows how to sew on each one.
Hood and Cape FAQ
Can I attach a hood to a cape without sewing?
Yes, if you use fleece. Fold a fleece rectangle into a hood, close the back with fringe knots, then thread one drawstring through slits in both the hood and the cape's neckline. Our no-sew cloak guide shows the method step by step.
Should I attach the hood before or after hemming the cape?
Attach the hood first, then hem the front edges and bottom. That way the front edges of the hood and cape can be hemmed in one line for a neater finish.
Making the cloak from scratch? See how to make a hood for a cloak, how to sew a cloak without a pattern and our best fabric for a cloak guide.