Glow-in-the-Dark Halloween Crafts: 6 Easy Projects
There's something properly magical about switching off the lights and watching your Halloween decorations start to glow. Glow-in-the-dark crafts are also a great way to make decorations that look spooky after dark without candles, which matters a lot if you have small children or pets.
This guide explains how glow paint actually works (and why it sometimes disappoints), then walks through six easy projects that suit children and adults alike.
How Glow-in-the-Dark Paint Works
Glow paint contains phosphorescent pigment that soaks up light and slowly releases it in the dark. That means it needs "charging" first. A few minutes under a bright lamp or in daylight is enough for a good glow, and the effect fades gradually over the following hour or so.
A few things make a big difference to how bright the result looks:
- Paint over white. Glow paint is semi-transparent. On card, wood, stone or pumpkins, a white base coat underneath reflects more light and makes the glow far brighter.
- Use several thin coats. Three or four thin layers glow much better than one thick coat.
- Charge just before dark. Shine a lamp, a torch or a UV (black) light on your crafts right before guests arrive.
- Pick green or aqua for the strongest glow. These colors are usually the brightest; orange, pink and purple glow paints tend to be fainter.
What You'll Need for Most Projects
- Glow-in-the-dark acrylic craft paint (non-toxic, labelled suitable for children)
- White acrylic paint for base coats
- Paintbrushes and sponges
- Clean glass jars, toilet paper rolls, card and small pumpkins
- Glow sticks (optional, for one-night projects)
- A bright lamp or UV torch for charging
1. Glowing Ghost Jars
Dab glow paint all over the inside of a clean, dry glass jar with a small sponge, building up three thin coats and letting each one dry before the next. The glass shows the glow through from the inside, so you don't need a white base coat here. On the outside, draw a ghost face in black permanent marker or paint. Charge the jars under a lamp and line them up along a windowsill or a path. In the dark, each jar becomes a glowing little ghost. For a lantern version with lights inside, see our mason jar Halloween lanterns.
2. Spooky Eyes in the Bushes
This is one of the simplest and most effective outdoor decorations. Paint pairs of eyes onto toilet paper rolls: cut two eye shapes out of each roll with craft scissors, then paint the inside of the roll with glow paint (or slip a snapped glow stick inside). Tuck the rolls into hedges, under steps and between plant pots. After dark, it looks as if creatures are watching from the shadows. Older children can cut angry, sleepy or surprised eye shapes. More ideas for rolls are in our toilet paper roll Halloween crafts.
3. Glow Painted Pumpkins
Paint a jack-o'-lantern face or a pattern of stars onto a pumpkin with glow paint over a white base. It's a no-carve option that lasts longer than a carved pumpkin and is safe for younger children to decorate. Faux craft pumpkins can be painted and reused year after year. For more ideas, see our no-carve pumpkin decorating guide.
4. Glow-in-the-Dark Spider Web
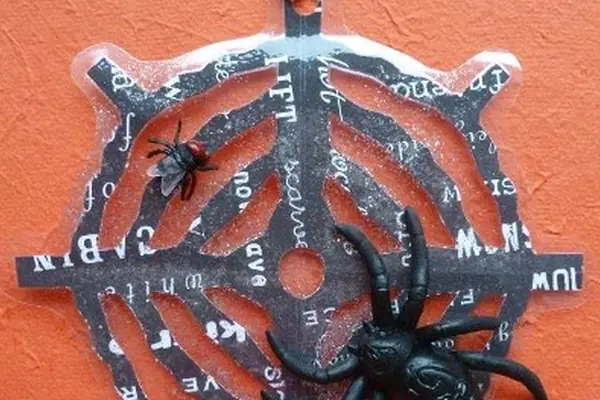
Draw a spider web on a large sheet of black card with a pencil, then go over the lines with glow paint applied from a fine-nozzled bottle or a thin brush. Add a black card spider outlined in glow paint. Stick it on a bedroom door or the front door, and it will appear to light up as the hallway lights go off. If you'd rather make a cut-paper version, follow our paper spider web tutorial.
5. Glow Stick Skeleton Window
For a one-night decoration, tape glow sticks onto a sheet of black card in the shape of a skeleton: a circle for the skull, a long stick for the spine, shorter ones for the ribs, arms and legs. Snap the sticks to activate them just before trick or treaters arrive. Place the card in a window facing the street. Children love designing their own glowing creatures with this method.
6. Glow Rock Pumpkin Patch
Paint small rocks orange, then add jack-o'-lantern faces in glow paint. During the day they're cheerful pumpkins; at night only their faces glow. Our guide to painted Halloween rocks explains how to prepare and seal them so they last outdoors.
Where to Put Glow-in-the-Dark Decorations
Glow decorations look best in really dark spots, so think about where the light from lamps and streetlights doesn't reach. Good places include the bottom of a staircase, a hallway that gets switched off at night, a child's bedroom (it doubles as a gentle night light) and the darkest corner of the garden.
Outside, place glowing items along a path or up the front steps so trick or treaters can see where to walk. Keep a lamp or torch by the door so you can recharge everything between visitors. A UV torch is especially good at charging glow paint quickly, and it makes white and neon items glow brightly too.
Safety Tips
- Choose paints labelled non-toxic and suitable for children, and follow the age guidance on the bottle.
- Glow sticks contain a liquid that can irritate skin and eyes. Don't let children chew or cut them open, and throw away any that leak.
- UV torches should never be shone into anyone's eyes.
- Glow decorations are a great swap for candles, but if you also use real flames, keep them well away from paper and card crafts.
Frequently Asked Questions
How long does glow-in-the-dark paint glow?
It's brightest for the first few minutes after charging and then fades gradually. Recharge your decorations with a lamp or torch during the evening to bring the glow back.
Why does my glow paint barely glow?
Usually it needs a white base coat, more coats of paint, or a longer charge under bright light. Cheap paints may also contain less pigment.
Can I use glow paint outside?
Yes, but seal it with an outdoor varnish once dry, so rain doesn't wash it away.
Looking for more decorating projects? Browse our DIY Halloween decorations or the full collection of Halloween crafts for kids.