How to Make DIY Potion Bottles for Halloween Decor
A shelf of mysterious potion bottles is one of the most atmospheric Halloween decorations you can make, and it costs almost nothing. The secret is variety: tall bottles next to squat jars, cloudy glass beside clear, bubbling green liquid next to a jar of "dragon's teeth." Collect interesting bottles for a few weeks before Halloween and you'll be surprised how quickly a collection builds up.
This guide covers cleaning and aging the bottles, ideas for filling them, and finishing touches such as corks, wax seals and labels. Pair them with our free printable potion bottle labels and you'll have a whole apothecary shelf in an afternoon.
What You Need
- Glass bottles and jars in different shapes and sizes (sauce bottles, vinegar bottles, small jam jars, spice jars)
- Corks, or lids you can cover
- Warm soapy water and a bottle brush
- Food coloring, water and a little washing-up liquid or glycerin
- Dry fillers such as dried beans, lentils, rice, herbs, cinnamon sticks, moss or small plastic insects
- Acrylic paint, a sponge and kitchen paper for aging
- Jute twine, string, thin wire, small keys or charms
- Printable labels and PVA glue or decoupage medium
- Optional: a hot glue gun and a few old crayons or candle stubs for "wax" seals
Step 1: Collect and Clean Your Bottles
Soak bottles in hot, soapy water for half an hour to loosen the labels. Peel them off, then remove sticky residue with a little cooking oil on a cloth followed by another wash. Dry the bottles upside down on a rack. Old-fashioned shapes, colored glass and bottles with interesting shoulders or necks look the most "magical," but even ordinary jars work once they're labeled.
Step 2: Age the Glass
New glass looks very clean. A few simple techniques make it look as if it's been sitting in a witch's cottage for a century:
- Grime wash. Water down brown or black acrylic paint until it's like dirty water. Brush it over the outside of the bottle, then wipe most of it away with kitchen paper so it stays in the ridges and around the neck.
- Frosted glass. Dab a little white or pale green paint over the bottle with a sponge for a cloudy, misty look.
- Drips. Run a little paint around the rim and let it drip down the neck, then allow it to dry standing upright.
- Twine wraps. Wrap jute twine tightly around the neck of the bottle, securing each end with a dot of glue.
Step 3: Fill the Bottles
Colored liquids
Mix water with a few drops of food coloring. Green, purple and red look the most dramatic, and a drop of blue in red water gives a deep "blood" color. A few drops of glycerin or washing-up liquid make the liquid look thicker and give it a slight shimmer when the bottle is moved. Fill the bottle to just below the neck and seal it tightly.
Colored water doesn't keep forever, so if your display will be up for several weeks, add a tiny splash of white vinegar to slow cloudiness, or replace the water when it starts to look murky.
Dry ingredients
Dry fillers last all season and can be packed away for next year. Some ideas, with the "potion" names that make them fun:
- Black beans or lentils as "beetle eggs"
- Cinnamon sticks or twigs as "wizard's wood"
- Dried moss as "swamp moss"
- Red lentils as "dragon scales"
- White rice or salt as "powdered bone"
- Small plastic spiders, bugs or eyeballs as, well, spiders, bugs and eyeballs
Glowing potions
Drop a battery-operated LED fairy light string into an empty bottle, or stand a bottle filled with colored water on top of an LED tea light. The light shining up through green or orange liquid looks wonderful on a dark shelf.
Step 4: Seal and Label
Push a cork into the neck, or cover a screw-top lid with a circle of fabric or brown paper tied on with twine. For a melted wax seal, drip hot glue over the cork and around the neck, let it set for a minute, then brush it with red or black paint. An adult should handle the glue gun.
Finally, add a label. You can print our free Halloween potion labels or the Princess Bride potion labels, or handwrite your own on torn brown paper. Tie a small key, a feather or a paper tag with a "recipe" around the neck for extra character.
Styling Your Potion Shelf
- Group bottles in odd numbers, with the tallest at the back.
- Mix glowing bottles with plain ones so the light doesn't wash out the whole display.
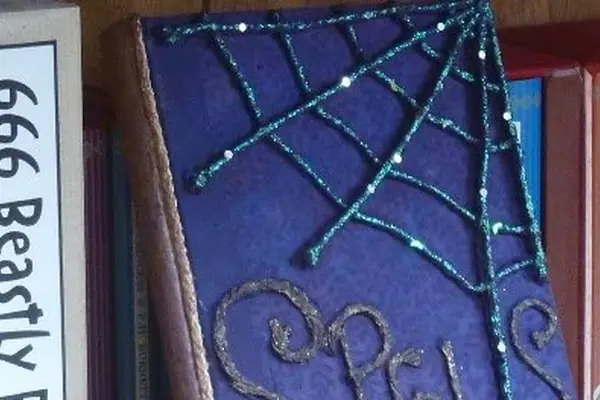
- Add a few old books, a homemade spell book and some printable book spines behind the bottles.
- Drape a little stretchy cobweb over the corners and add a plastic spider or two.
- A witch hat or a twig broom nearby completes the scene.
Potion Name Ideas for Your Labels
Half the fun is in the names. If you are writing your own labels, here are some to borrow:
- Essence of Nightshade
- Bottled Moonlight
- Vampire's Blood, Vintage 1897
- Toad Toe Tonic
- Elixir of Eternal Youth (Shake Well)
- Ghost Tears
- Werewolf Hair Restorer
- Liquid Luck, Use Sparingly
Handwrite the names in brown or black ink on torn parchment-colored paper, or print them in an old-fashioned font. Tea-staining the labels before you stick them on makes them look as if they've been on the shelf for years.
Safety Notes
- Clearly mark that the bottles are decorations, and keep them out of reach of small children who might think colored water is a drink.
- Never put real candles inside bottles. Use LED lights only.
- Glass can break: stand bottles on a stable shelf, away from the edge.
Frequently Asked Questions
Where can I find interesting bottles?
Your own recycling is the best source. Charity shops, car boot sales and craft stores also sell inexpensive glass bottles, and miniature bottles with corks are available in multipacks.
How do I stop colored water going cloudy?
Use clean bottles and boiled, cooled water, seal them well and keep them out of direct sunlight. Replace the water if it starts to look murky.
Can children help make potion bottles?
Yes, children love filling and labeling them. Use plastic bottles or small, thick jars for younger children, and let an adult handle the glue gun.
For more spooky home décor ideas, browse our DIY Halloween decorations and witch crafts.