How to Make a Zombie Cookies Recipe for Halloween
Here's some ghoulishly good zombie cookies recipe for Halloween. This easy recipe features gruesome zombie feet with a marbled green and yellow fondant "skin" which is covered in festering sores. Eat the cookie body parts before the zombies come and feast on you.
Zombie cookie feet are a ghastly but very easy to make sweet treat for Halloween and zombie themed parties. The gross looking zombie feet cookies should really get your guests spooked. These are quick and easy to make using a foot shaped cookie cutter.
Luckily the feet taste a whole lot nicer than they look because they're vanilla sugar cookies topped with sweet fondant icing. They're a really fun project for which you use ready to roll icing. Assembling the gruesome feet is an easy and fun task.
Note: This post may contain affiliate links for which I can be compensated.

If you're hosting a Halloween party or a birthday party that features either zombies or monsters as the theme, here's some truly foul looking zombie feet cookies which are perfect for grossing out your guests.
Thankfully the foul looking feet are made with a vanilla sugar cookie base and some easy to roll rolled fondant icing as the topping. They might look gruesome but they really taste divine. And they're lots of fun to make too.
If you have any aspiring child cooks, let them join in by squashing and mixing the green and yellow zombie fondant icing flesh together - it's just like play doh but safe to eat.


Ghastly zombie body part cookies which look gross but are delicious to eat. I've made feet with shaped cookie cutters but you can easily make hands or other body parts with other cookie cutters. Just make sure you bite into these scabby and rotten feet before they bite into you.
Prep time 30 min - Total time 75 min
Sugar cookie ingredients for up to 20 small servings:
113g unsalted butter
113g caster sugar
1 beaten egg
1/2 teaspoon vanilla extract
225g plain flour
Or use your own favorite sugar cookie recipe. Try allrecipes.com for recipes with US measurements.
You will also need:
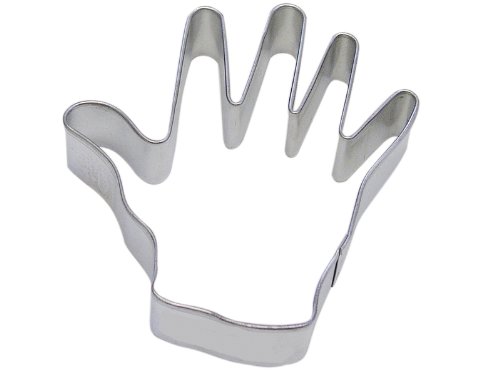
Body part cookie cutters - hands, feet, people cutters
Ready to roll rolled fondant icing
Apricot preserve fruit spread - small amount for adding fondant
Place your softened butter and sugar into a big mixing bowl and combine the ingredients with a hand or electric whisk. Add in 1 egg and your vanilla extract and mix everything together. Gradually add the plain flour into the bowl and mix this in as well.
Once everything is well mixed, use your hands to push all the dough mix into a large ball of dough. Cover this in plastic food wrap and chill in the refrigerator for about 30 mins.

Roll out the vanilla cookie dough. If you don't have enough work surface to roll the dough in one go, just roll out half to start with. I like quite thin cookies at about 5mm thickness. Whatever size you opt for is pretty much the size they will be once cooked.
Cut out your Zombie cookies with your body part or feet cookie cutters and place them onto lightly floured baking trays. Bake on Gas 4 (350°F / 177°C) for around 10-12 mins. When the cookies are ready, they should be a nice golden brown. Allow the feet to cool down on cooling racks.

I prefer ready to roll rolled fondant icing like Regal-Ice which you can buy in a wide range of colors and it's easy to use. It's pretty much like edible play doh. Great fun for kids and grown ups too.
Ready to roll fondant icing is sticky - to make it easier to work with, prime your work surface and your hands with a generous sprinkling of confectioners' sugar also known as icing sugar.
Take a fist-sized amount of yellow icing and a fist-sized amount of green icing. Push these colors together into a ball and squeeze and shape the ball shape until you get a nice mix of green and yellow.
Roll the fondant out to around 5mm and you should have a great marbled effect of green and yellow fondant. Cut out enough feet to match the amount of cookies that you have.

Warm a couple of tablespoons of apricot preserve fruit spread in a small microwave bowl for a short blast of 10 seconds or until just warm.
Spread a small amount of preserve over a foot cookie using a teaspoon. Pick up a yellow and green fondant foot with a blunt knife underneath and place it over the top of the cookie. Press the fondant down gently into place.

Roll out a tiny amount of yellow fondant icing. Use a sharp knife to cut some small triangular shapes out to stick on to your cookies as toenails. To stick these on, just dab a tiny bit of water where you want the toenail to go and press it on.

You could just leave the zombie feet cookies as they are. Even better is to add on some bloody open sores with a ring of yellow pus around. That is sure to really gross your guests out!
Roll out some yellow fondant. Take a tiny bit of red (about the size of your smallest fingertip) and press into the yellow fondant. Make enough red blobs of fondant for all the cookies you need to decorate. Make sure that you have a nice gap of yellow fondant around each bit of red. Dust a little confectioner's sugar on and roll lightly over the top.
You now have some sores which you can cut out with a knife. Cut out the red bits with a little of yellow surrounding it. Stick these to your feet using a small amount of water.

Another optional part is to add in some rotting black areas of skin onto your feet. I achieved this look by using a small, clean paintbrush to paint on some black icing from a ready-made squeeze tube.
You could also roll out some very thin lines of black fondant icing and press into your cookies using water to 'glue' them in place. Have fun making some really gross zombie cookies with this recipe - yum!
Related Content You Should Also Love:
Page Last Updated:
Zombie cookie feet are a ghastly but very easy to make sweet treat for Halloween and zombie themed parties. The gross looking zombie feet cookies should really get your guests spooked. These are quick and easy to make using a foot shaped cookie cutter.
Luckily the feet taste a whole lot nicer than they look because they're vanilla sugar cookies topped with sweet fondant icing. They're a really fun project for which you use ready to roll icing. Assembling the gruesome feet is an easy and fun task.
Note: This post may contain affiliate links for which I can be compensated.
Easy Zombie Cookies Recipe for Halloween: Make These Gruesome Feet and Other Body Parts
If you're hosting a Halloween party or a birthday party that features either zombies or monsters as the theme, here's some truly foul looking zombie feet cookies which are perfect for grossing out your guests.
Thankfully the foul looking feet are made with a vanilla sugar cookie base and some easy to roll rolled fondant icing as the topping. They might look gruesome but they really taste divine. And they're lots of fun to make too.
If you have any aspiring child cooks, let them join in by squashing and mixing the green and yellow zombie fondant icing flesh together - it's just like play doh but safe to eat.
How to Make Zombie Body Part Cookies: Directions

Ghastly zombie body part cookies which look gross but are delicious to eat. I've made feet with shaped cookie cutters but you can easily make hands or other body parts with other cookie cutters. Just make sure you bite into these scabby and rotten feet before they bite into you.
Prep time 30 min - Total time 75 min
Sugar cookie ingredients for up to 20 small servings:
113g unsalted butter
113g caster sugar
1 beaten egg
1/2 teaspoon vanilla extract
225g plain flour
Or use your own favorite sugar cookie recipe. Try allrecipes.com for recipes with US measurements.
You will also need:
Body part cookie cutters - hands, feet, people cutters
Ready to roll rolled fondant icing
Apricot preserve fruit spread - small amount for adding fondant
Step 1: Make the Zombie Cookie Dough
Place your softened butter and sugar into a big mixing bowl and combine the ingredients with a hand or electric whisk. Add in 1 egg and your vanilla extract and mix everything together. Gradually add the plain flour into the bowl and mix this in as well.
Once everything is well mixed, use your hands to push all the dough mix into a large ball of dough. Cover this in plastic food wrap and chill in the refrigerator for about 30 mins.
Step 2: Cut Out and Bake the Cookies
Roll out the vanilla cookie dough. If you don't have enough work surface to roll the dough in one go, just roll out half to start with. I like quite thin cookies at about 5mm thickness. Whatever size you opt for is pretty much the size they will be once cooked.
Cut out your Zombie cookies with your body part or feet cookie cutters and place them onto lightly floured baking trays. Bake on Gas 4 (350°F / 177°C) for around 10-12 mins. When the cookies are ready, they should be a nice golden brown. Allow the feet to cool down on cooling racks.
Step 3: Making Marbled Fondant Icing for Zombie Like Flesh
I prefer ready to roll rolled fondant icing like Regal-Ice which you can buy in a wide range of colors and it's easy to use. It's pretty much like edible play doh. Great fun for kids and grown ups too.
Ready to roll fondant icing is sticky - to make it easier to work with, prime your work surface and your hands with a generous sprinkling of confectioners' sugar also known as icing sugar.
Take a fist-sized amount of yellow icing and a fist-sized amount of green icing. Push these colors together into a ball and squeeze and shape the ball shape until you get a nice mix of green and yellow.
Roll the fondant out to around 5mm and you should have a great marbled effect of green and yellow fondant. Cut out enough feet to match the amount of cookies that you have.
Step 4: Adding the Fondant to the Cookies
Warm a couple of tablespoons of apricot preserve fruit spread in a small microwave bowl for a short blast of 10 seconds or until just warm.
Spread a small amount of preserve over a foot cookie using a teaspoon. Pick up a yellow and green fondant foot with a blunt knife underneath and place it over the top of the cookie. Press the fondant down gently into place.
Step 5: Making Sharp Yellow Zombie Toenails
Roll out a tiny amount of yellow fondant icing. Use a sharp knife to cut some small triangular shapes out to stick on to your cookies as toenails. To stick these on, just dab a tiny bit of water where you want the toenail to go and press it on.
Step 6: Adding Sore Bloody Scabs to Your Body Part Cookies
You could just leave the zombie feet cookies as they are. Even better is to add on some bloody open sores with a ring of yellow pus around. That is sure to really gross your guests out!
Roll out some yellow fondant. Take a tiny bit of red (about the size of your smallest fingertip) and press into the yellow fondant. Make enough red blobs of fondant for all the cookies you need to decorate. Make sure that you have a nice gap of yellow fondant around each bit of red. Dust a little confectioner's sugar on and roll lightly over the top.
You now have some sores which you can cut out with a knife. Cut out the red bits with a little of yellow surrounding it. Stick these to your feet using a small amount of water.
Step 7: Rotting Black Skin Detail on the Zombie Cookies
Another optional part is to add in some rotting black areas of skin onto your feet. I achieved this look by using a small, clean paintbrush to paint on some black icing from a ready-made squeeze tube.
You could also roll out some very thin lines of black fondant icing and press into your cookies using water to 'glue' them in place. Have fun making some really gross zombie cookies with this recipe - yum!
Related Content You Should Also Love:
7 Spooky Halloween Cupcake Ideas
How to Make an Edible Chocolate Spider's Web
More on Zombies to Enjoy
More Halloween Food Inspiration
How to Make an Edible Chocolate Spider's Web
More on Zombies to Enjoy
More Halloween Food Inspiration
Page Last Updated:
Comments
Post a Comment
Just Halloween Crafts is a site dedicated to my favorite time of year and the whole spook time season that surrounds October 31st. I love to decorate the home with handmade, DIY and crafted items for Halloween as well as make costume accessories and do fun crafting activities. Using papercrafts, sewing with felt, no-sew techniques and more, you can create a wonderful scheme to your decor whether you are going for scary themes or more fun ones with pumpkins and more. Ghosts, witches, wizards and more make for fun crafting sessions. Thanks for leaving me a comment. Comments do not show until I approve them. Marie